
Prerequisites
You should use a non-root user account with sudo privileges. Please see the Initial server setup for Ubuntu 18.04 / 19.10 guide for more details.
1. Install Nginx
Let’s begin by updating the package lists and installing Nginx on Ubuntu 18.04 / 19.10. Below we have two commands separated by &&. The first command will update the package lists to ensure you get the latest version and dependencies for Nginx. The second command will then download and install Nginx.
sudo apt update && sudo apt install nginxOnce installed, check to see if the Nginx service is running.
sudo service nginx statusIf Nginx is running correctly, you should see a green Active state below.
● nginx.service - A high performance web server and a reverse proxy server
   Loaded: loaded (/lib/systemd/system/nginx.service; enabled; vendor preset: enabled)
   Active: active (running) since Wed 2018-05-09 20:42:29 UTC; 2min 39s ago
     Docs: man:nginx(8)
  Process: 27688 ExecStart=/usr/sbin/nginx -g daemon on; master_process on; (code=exited, status=0/SUCCESS)
  Process: 27681 ExecStartPre=/usr/sbin/nginx -t -q -g daemon on; master_process on; (code=exited, status=0/SUCCESS)
 Main PID: 27693 (nginx)
    Tasks: 2 (limit: 1153)
   CGroup: /system.slice/nginx.service
           ├─27693 nginx: master process /usr/sbin/nginx -g daemon on; master_process on;
           └─27695 nginx: worker process
You may need to press q to exit the service status.
2. Configure Firewall
If you haven’t already done so, it is recommended that you enable the ufw firewall and add a rule for Nginx. Before enabling ufw firewall, make sure you add a rule for SSH, otherwise you may get locked out of your server if you’re connected remotely.
sudo ufw allow OpenSSHIf you get an error “ERROR: could find a profile matching openSSH”, this probably means you are not configuring the server remotely and can ignore it.
Now add a rule for Nginx.
sudo ufw allow 'Nginx HTTP'Rule added
Rule added (v6)Enable ufw firewall.
sudo ufw enablePress y when asked to proceed.
Now check the firewall status.
sudo ufw statusStatus: active
To Action From
-- ------ ----
OpenSSH ALLOW Anywhere
Nginx HTTP ALLOW Anywhere
OpenSSH (v6) ALLOW Anywhere (v6)
Nginx HTTP (v6) ALLOW Anywhere (v6)That’s it! Your Nginx web server on Ubuntu 18.04 / 19.10 should now be ready.
3. Test Nginx
Go to your web browser and visit your domain or IP. If you don’t have a domain name yet and don’t know your IP, you can find out by running:
ip a | grep -Eo 'inet (addr:)?([0-9]*\.){3}[0-9]*' | grep -Eo '([0-9]*\.){3}[0-9]*' | grep -v '127.0.0.1'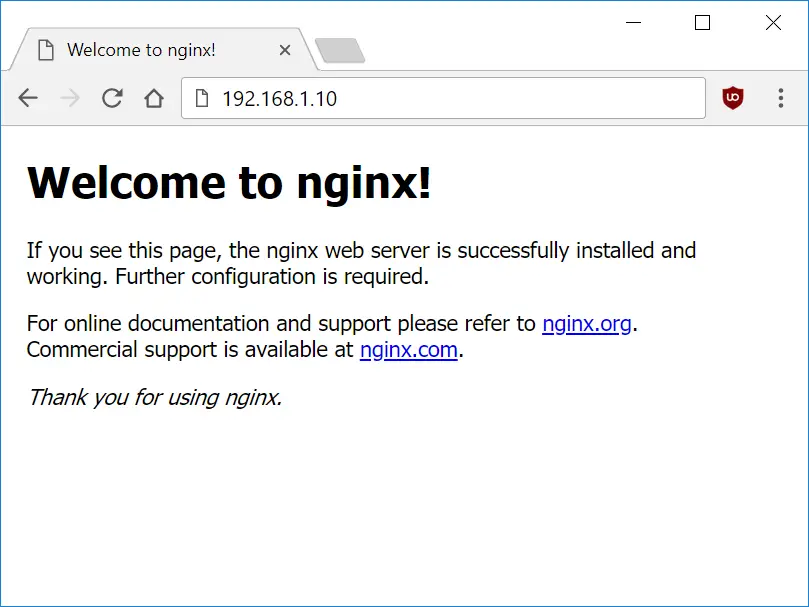
You can find this Nginx default welcome page in the document root directory /var/www/html. To edit this file in nano text editor:
sudo nano /var/www/html/index.nginx-debian.htmlTo save and close nano, press CTRL + X and then press y and ENTER to save changes.
Your Nginx web server is ready to go! You can now add your own html files and images the the /var/www/html directory as you please.
However, you should acquaint yourself with and set up at least one Server Block for Nginx as most of our Ubuntu 18.04 / 19.10 guides are written with Server Blocks in mind. Please see article Installing Nginx on Ubuntu 18.04 / 19.10 with Multiple Domains. Server Blocks allow you to host multiple web sites/domains on one server. Even if you only ever intend on hosting one website or one domain, it’s still a good idea to configure at least one Server Block.
If you don’t want to set up Server Blocks, continue to the next step to set up MySQL.
4. Install MySQL
Let’s begin by updating the package lists and installing MySQL on Ubuntu 18.04 / 19.10. Below we have two commands separated by &&. The first command will update the package lists to ensure you get the latest version and dependencies for MySQL. The second command will then download and install MySQL.
sudo apt update && sudo apt install mysql-serverPress y and ENTER when prompted to install the MySQL package.
Once the package installer has finished, we can check to see if the MySQL service is running.
sudo service mysql statusIf running, you will see a green Active status like below.
● mysql.service - MySQL Community Server
Loaded: loaded (/lib/systemd/system/mysql.service; enabled; vendor preset: enabled)
Active: active (running) since since Wed 2018-05-09 21:10:24 UTC; 16s ago
 Main PID: 30545 (mysqld)
    Tasks: 27 (limit: 1153)
   CGroup: /system.slice/mysql.service
           └─30545 /usr/sbin/mysqld --daemonize --pid-file=/run/mysqld/mysqld.pid
You may need to press q to exit the service status.
5. Configure MySQL Security
You should now run mysql_secure_installation to configure security for your MySQL server.
sudo mysql_secure_installationIf you created a root password in Step 1, you may be prompted to enter it here. Otherwise you will be asked to create one. (Generate a password here)
You will be asked if you want to set up the Validate Password Plugin. It’s not really necessary unless you want to enforce strict password policies for some reason.
Securing the MySQL server deployment.

Connecting to MySQL using a blank password.

VALIDATE PASSWORD PLUGIN can be used to test passwords
and improve security. It checks the strength of password
and allows the users to set only those passwords which are
secure enough. Would you like to setup VALIDATE PASSWORD plugin?

Press y|Y for Yes, any other key for No:
Press n and ENTER here if you don’t want to set up the validate password plugin.
Please set the password for root here.

New password:

Re-enter new password:
If you didn’t create a root password in Step 1, you must now create one here.
Generate a strong password and enter it. Note that when you enter passwords in Linux, nothing will show as you are typing (no stars or dots).
By default, a MySQL installation has an anonymous user,
allowing anyone to log into MySQL without having to have
a user account created for them. This is intended only for
testing, and to make the installation go a bit smoother.
You should remove them before moving into a production
environment.

Remove anonymous users? (Press y|Y for Yes, any other key for No) :
Press y and ENTER to remove anonymous users.
Normally, root should only be allowed to connect from
'localhost'. This ensures that someone cannot guess at
the root password from the network.

Disallow root login remotely? (Press y|Y for Yes, any other key for No) :
Press y and ENTER to disallow root login remotely. This will prevent bots and hackers from trying to guess the root password.
By default, MySQL comes with a database named 'test' that
anyone can access. This is also intended only for testing,
and should be removed before moving into a production
environment.

Remove test database and access to it? (Press y|Y for Yes, any other key for No) :
Press y and ENTER to remove the test database.
Reloading the privilege tables will ensure that all changes
made so far will take effect immediately.

Reload privilege tables now? (Press y|Y for Yes, any other key for No) :
Press y and ENTER to reload the privilege tables.
All done!
As a test, you can log into the MySQL server and run the version command.
sudo mysqladmin -p -u root versionEnter the MySQL root password you created earlier and you should see the following:
mysqladmin  Ver 8.42 Distrib 5.7.22, for Linux on x86_64
Copyright (c) 2000, 2018, Oracle and/or its affiliates. All rights reserved.

Oracle is a registered trademark of Oracle Corporation and/or its
affiliates. Other names may be trademarks of their respective
owners.

Server version          5.7.22-0ubuntu18.04.1
Protocol version        10
Connection              Localhost via UNIX socket
UNIX socket             /var/run/mysqld/mysqld.sock
Uptime:                 4 min 28 sec

Threads: 1  Questions: 15  Slow queries: 0  Opens: 113  Flush tables: 1  Open tables: 106  Queries per second avg: 0.055
You have now successfully installed and configured MySQL for Ubuntu 18.04 / 19.10! Continue to the next step to install PHP.
6. Install PHP
Unlike Apache, Nginx does not contain native PHP processing. For that we have to install PHP-FPM (FastCGI Process Manager). FPM is an alternative PHP FastCGI implementation with some additional features useful for heavy-loaded sites.
Let’s begin by updating the package lists and installing PHP-FPM on Ubuntu 18.04 / 19.10. We will also install php-mysql to allow PHP to communicate with the MySQL database. Below we have two commands separated by &&. The first command will update the package lists to ensure you get the latest version and dependencies for PHP-FPM and php-mysql. The second command will then download and install PHP-FPM and php-mysql. Press y and ENTER when asked to continue.
sudo apt update && sudo apt install php-fpm php-mysqlOnce installed, check the PHP version.
php --versionIf PHP was installed correctly, you should see something similar to below.
PHP 7.2.3-1ubuntu1 (cli) (built: Mar 14 2018 22:03:58) ( NTS )
Copyright (c) 1997-2018 The PHP Group
Zend Engine v3.2.0, Copyright (c) 1998-2018 Zend Technologies
with Zend OPcache v7.2.3-1ubuntu1, Copyright (c) 1999-2018, by Zend Technologies
Above we are using PHP version 7.2, though this may be a later version for you depending on which package was in the repository.
Depending on what version of Nginx and PHP you install, you may need to manually configure the location of the PHP socket that Nginx will connect to.
List the contents for the directory /var/run/php/
ls /var/run/php/You should see a few entries here.
php7.2-fpm.pid php7.2-fpm.sockAbove we can see the socket is called php7.2-fpm.sock. Remember this as you may need it for the next step.
7. Configure Nginx for PHP
We now need to make some changes to our Nginx server block.
The location of the server block may vary depending on your setup. By default, it is located in /etc/nginx/sites-available/default.
However, if you have previously set up custom server blocks for multiple domains in one of our previous guides, you will need to add the PHP directives to each server block separately. A typical custom server block file location would be /etc/nginx/sites-available/mytest1.com.
For the moment, we will assume you are using the default. Edit the file in nano.
sudo nano /etc/nginx/sites-available/defaultPress CTRL + W and search for index.html.
Now add index.php before index.html
index index.php index.html index.htm index.nginx-debian.html;
Press CTRL + W and search for the line server_name.
Enter your server’s IP here or domain name if you have one.
server_name YOUR_DOMAIN_OR_IP_HERE;
Press CTRL + W and search for the line location ~ \.php.
You will need to uncomment some lines here by removing the # signs before the lines marked in red below.
Also ensure value for fastcgi_pass socket path is correct. For example, if you installed PHP version 7.2, the socket should be: /var/run/php/php7.2-fpm.sock
If you are unsure which socket to use here, exit out of nano and run ls /var/run/php/
...
        location ~ \.php$ {
                include snippets/fastcgi-php.conf;
        #
        #       # With php-fpm (or other unix sockets):
                fastcgi_pass unix:/var/run/php/php7.2-fpm.sock;
        #       # With php-cgi (or other tcp sockets):
        #       fastcgi_pass 127.0.0.1:9000;
        }
...
Once you’ve made the necessary changes, save and close (Press CTRL + X, then press y and ENTER to confirm save)
Now check the config file to make sure there are no syntax errors. Any errors could crash the web server on restart.
sudo nginx -tnginx: the configuration file /etc/nginx/nginx.conf syntax is ok
nginx: configuration file /etc/nginx/nginx.conf test is successfulIf no errors, you can reload the Nginx config.
sudo service nginx reload8. Test PHP
To see if PHP is working correctly on Ubuntu 18.04 / 19.10, let’s a create a new PHP file called info.php in the document root directory. By default, this is located in /var/www/html/, or if you set up multiple domains in a previous guide, it may be located in somewhere like /var/www/mytest1.com/public_html
Once you have the correct document root directory, use the nano text editor to create a new file info.php
sudo nano /var/www/html/info.phpType or paste the following code into the new file. (if you’re using PuTTY for Windows, right-click to paste)
<?php
phpinfo();
Save and close (Press CTRL + X, then press y and ENTER to confirm save)
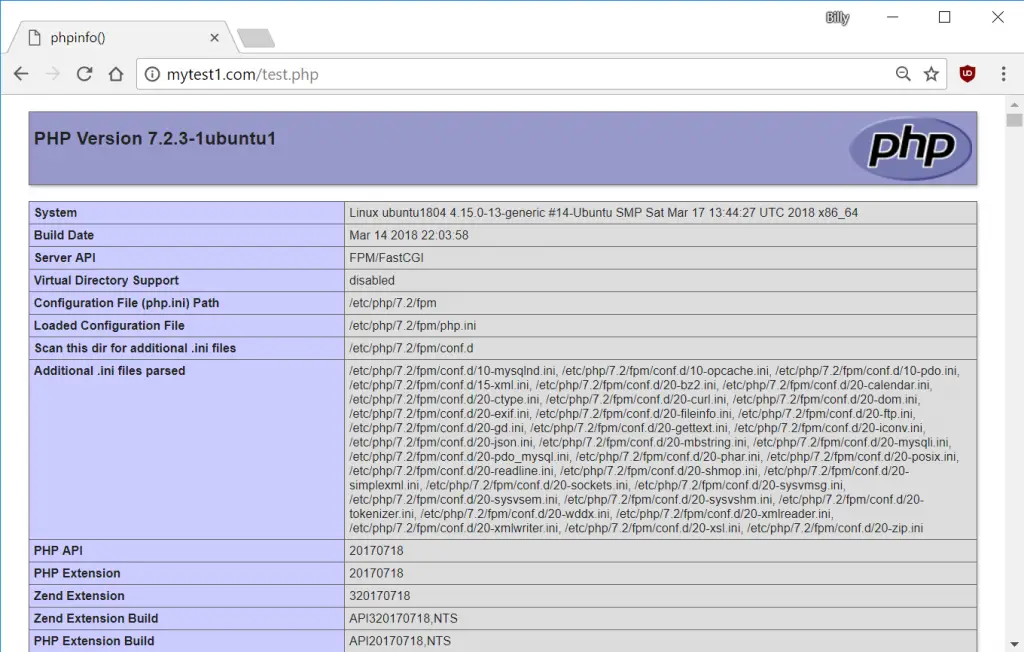
You can now view this page in your web browser by visiting your server’s domain name or public IP address followed by /info.php: http://your_domain_or_IP/info.php
phpinfo() outputs a large amount of information about the current state of PHP. This includes information about PHP compilation options and extensions, the PHP version and server information.
You have now successfully installed PHP-FPM for Nginx on Ubuntu 18.04 / 19.10.
Make sure to delete info.php as it contains information about the web server that could be useful to attackers.
sudo rm /var/www/html/info.phpWhat Next?
Now that your Ubuntu 18.04 / 19.10 LEMP web server is up and running, you may want to install phpMyAdmin so you can manage your MySQL server.
To set up a free SSL cert for your domain:
You may want to install and configure an FTP server
We also have several other articles relating to the day-to-day management of your Ubuntu 18.04 / 19.10 LEMP server
- What to do when you see *** System Restart Required ***
- How to update Ubuntu
- Automatically Back Up Your Web Server Doc Root with Tar and Cron
- Better system monitoring with htop
- Where are the Nginx Error and Access Log Files Located?
Let me know if this helped. Follow me on Twitter, Facebook and YouTube, or 🍊 buy me a smoothie.
ifconfig has been deprecated to ip, for the ip address identification step
Thanks. Does this work for you?
Wonderfull explication nice one
all done but when i test info.php i got 502 badgetway error
Thank You! I tried 6 attempts to install lemp and each time I had to reinstall my vps and start over. Got it on the first attempt with your tutorial. It was thoroughly explained to the T! Working properly now. Thank you!
👍🏻
thanks
I want to see/control php from my web browser. After I installed PHPFPM as told above, and went to browser, type https://mydomainname.com/myphp it showed “page not found”.
How can I get the correct php web login page?
Hey there. These are great tutorials! It helped me getting an idea how to get my own vServer up and running, since i didn’t buy techsupport from my provider.
What do you think of using mastodon additional to twitter. I am sure there would be a couple more followers pop up than left twitter alone. It would at least be me.
Mastodon works the same as twitter, but is an FreeLibre/OpenSoure project – which means everyone can host their own Mastodon (as if anyone could host their own twitter) since there is no central control.
This is really great tutorial.
While typing the command
sudo ufw allow 'Nginx HTTP'
I get the below error
ERROR: Could not find a profile matching 'Nginx HTTP'
Everything just stopped working after I bumped php7.2-fpm -> php7.3-fpm, althou it did work excellent before I did that :/
Here is what I did;
Added the ppa:ondrej/php repository and updated.
Edited /etc/nginx/sites-available/default
fastcgi_pass unix:/var/run/php/php7.2-fpm.sock; -> fastcgi_pass unix:/var/run/php/php7.3-fpm.sock;
Edited /etc/php/7.3/fpm/php.ini and changed some values:
memory_limit = 256M
cgi.fix_pathinfo = 0
date.timezone = Europe/City
Saved.
4. Restarted Nginx/php7.3-fpm
5. Recreated phpinfo.php
6. Verified at, http://localhost/phpinfo.php
7. So far so good!
Now to the tricky part, I used your guide to install phpMyadmin and everything worked excellent !
After the update to 7.3 I can load localhost/whatever (.htpasswd) works fine.
After the .htpasswd is entered the sites just wont load….do I need to relink the phpmyadmin user account in MySQL ? Or why am I not getting any further then localhost/whatever1 localhost/whatever2 ?
Kind regards Amadeyo
Did you check the Nginx error and access logs?
sudo tail /var/log/nginx/error.log -n 200sudo tail /var/log/nginx/access.log -n 200sudo tail /var/log/nginx/error.log -n 200
Replies:
2019/05/30 20:38:33 [error] 1434#1434: *51 FastCGI sent in stderr: “PHP message: PHP Fatal error: Allowed memory size of 2097152 bytes exhausted (tried to allocate 131072 bytes) in /opt/Organizr/api/functions/homepage-connect-functions.php on line 2588” while reading response header from upstream, client: x.x.x.x, server: _, request: “GET /Organizr/api/?v1/launch_organizr HTTP/1.1”, upstream: “fastcgi://unix:/var/run/php/php7.3-fpm.sock:”, host: “x.x.x.x”, referrer: “http://10.10.6.25/Organizr/”
sudo tail /var/log/nginx/access.log -n 200
All looks good :S
Sorry for the late reply, been really hectic with work and kids, and cheers for helping me out !
the last ip address is fictional, just for an example where I replaced the actual IP with “x.x.x.x”.
Kinds regards / Amadeyo
Excelente tutorial!
Awesome! Instruction on point. Thank you.
Hey I understood the problem.
The problem is that it is pointing to instead of domain name…but my wordpress is configured to point to domain name. hence the file is not loading.
Check this error in console.
But I am unable to figure out how can i configure nginx to load domain name in wordpress links instead of ip address.
🙁
Image link https://imgur.com/a/I2XCWmr
Please make tutorial on how to setup multiple wordpress website & sub-domain on nginx + ubuntu 18.04.
I will be very thankful to you..
i am stuck for last 3 days.
Hi.. I am trying to install two wordpress site..I have installed it successfully too…everything is working fine but I am unable to point domain to these wordpress sites…home page html is loading fine but js css are not loading… it points to ip/.js/file/path instead of ip/domain/.js/file/path.
check these images https://imgur.com/a/I2XCWmr
phpinfo() is running fine.
pls help me learn….Thanks for the article..if possible make article on installing multiple website on nginx + ubuntu 18.04.
Sounds like you need to log in to WordPress and change the URL to your domain.
https://i.imgur.com/63UpKCy.png
Thanks for the reply…
I had already changed the url during setup….
also now i am unable to login…only front page is loading.
Now when I point the domain . It just downloads a file:
<?php
/**
* Front to the WordPress application. This file doesn’t do anything, but loads
* wp-blog-header.php which does and tells WordPress to load the theme.
*
* @package WordPress
*/
/**
* Tells WordPress to load the WordPress theme and output it.
*
* @var bool
*/
define(‘WP_USE_THEMES’, true);
/** Loads the WordPress Environment and Template */
require( dirname( FILE ) . ‘/wp-blog-header.php’ );
Fixed the above error , it was due to location ~ .php ( error.
But I still don’t uderstand how to point to domain name instead of ip address.
I have added the server_name domain.com http://www.domain.com:
but it loads just front html. As shown in previous img.
Many thanks for the guides!
This is the best of what is available and in one place for ubuntu.
No probs. Thanks for the comment 🙂
Sir Do you have any cache cleaning and maintenance tutorial? Thanks A lot for the articles
No, not yet, though it’s on the list!