Prerequisites
You should use a non-root user account with sudo privileges. Please see the Initial server setup for Ubuntu 18.04 / 19.10 guide for more details.
1. Install Apache
Let’s begin by updating the package lists and installing Apache on Ubuntu 18.04 / 19.10. Below we have two commands separated by &&. The first command will update the package lists to ensure you get the latest version and dependencies for Apache . The second command will then download and install Apache. Press y and ENTER when asked to continue.
sudo apt update && sudo apt install apache2Installation may take a few minutes. Once installed, continue to Step 2 to configure the firewall.
2. Configure Firewall
It is highly recommended that you configure a firewall for added security.
We’ll start by adding a firewall rule for SSH because if you are configuring your server remotely, you don’t want to get locked out when enabling the firewall! You may have already done this in the our Initial server setup for Ubuntu 18.04 / 19.10 guide, but it’s no harm adding it again just in case. If the rule already exists, the command will just skip it.
sudo ufw allow OpenSSHIf you get an error “ERROR: could find a profile matching openSSH”, this probably means you are not configuring the server remotely and can ignore it.
Now we can add the firewall rules for Apache.
sudo ufw allow in "Apache Full"Now enable the firewall if it isn’t already.
sudo ufw enablePress y if you see a message “Command may disrupt existing ssh connections”.
If the firewall was activated correctly, you should see “Firewall is active and enabled on system startup“.
You can also check the current firewall status with:
sudo ufw statusStatus: active
To Action From
-- ------ ----
OpenSSH ALLOW Anywhere
Apache Full ALLOW Anywhere
OpenSSH (v6) ALLOW Anywhere (v6)
Apache Full (v6) ALLOW Anywhere (v6)
Above we can see the firewall is active and has two rules per service. v6 is short for IPv6. This is the new Internet Protocol, which was introduced to deal with the long-anticipated problem of IPv4 address exhaustion.
3. Test Apache
To see if Apache installed correctly, we can check the current Apache service status.
sudo service apache2 statusIf it is up and running, you should see a green active state.
● apache2.service - The Apache HTTP Server
Loaded: loaded (/lib/systemd/system/apache2.service; enabled; vendor preset: enabled)
Drop-In: /lib/systemd/system/apache2.service.d
└─apache2-systemd.conf
Active: active (running) since Sat 2018-03-31 08:44:04 CEST; 15min ago
Main PID: 5727 (apache2)
Tasks: 55 (limit: 4915)
CGroup: /system.slice/apache2.service
├─5727 /usr/sbin/apache2 -k start
├─5728 /usr/sbin/apache2 -k start
└─5729 /usr/sbin/apache2 -k start

Mar 31 08:44:04 ubuntu1804 systemd[1]: Starting The Apache HTTP Server...
Mar 31 08:44:04 ubuntu1804 apachectl[5675]: AH00558: apache2: Could not reliably determine the server's fully qualified domain name, using 127.0.1.1.
Mar 31 08:44:04 ubuntu1804 systemd[1]: Started The Apache HTTP Server.
If you get the above error about a fully qualified domain name, you can ignore it.
You may need to press q to exit the server status.
Now that the Apache service is up and running, you should be able to view the test Apache web page through your web browser. Enter the IP address of your server in the address bar and hit ENTER.
If you don’t know your IP, you can find out with the following command.
ip a | grep -Eo 'inet (addr:)?([0-9]*\.){3}[0-9]*' | grep -Eo '([0-9]*\.){3}[0-9]*' | grep -v '127.0.0.1'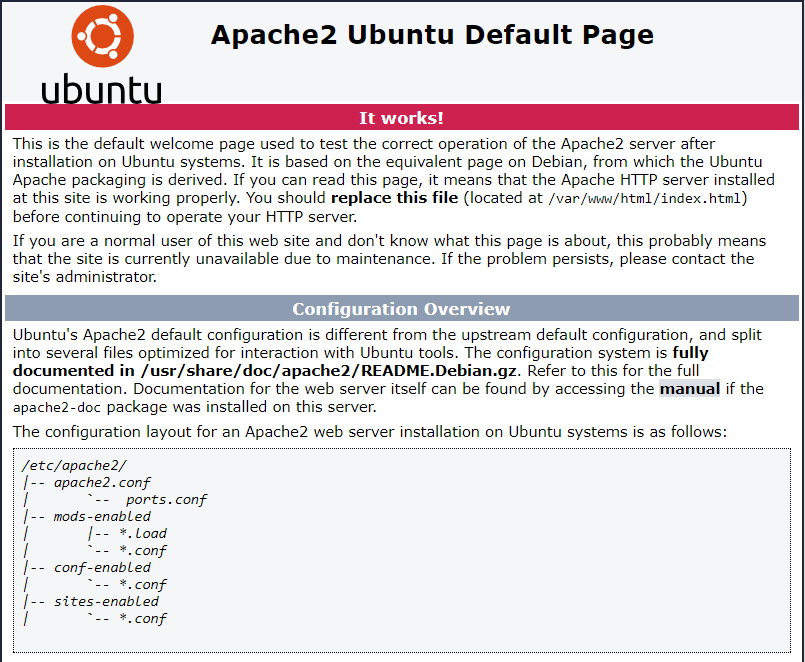
You’re all set! You can find this Apache default welcome page in the folder /var/www/html. To edit this file:
sudo nano /var/www/html/index.htmlPress CTRL + X to exit the nano text editor.
Your Apache web server is ready to go! You can now add your own html files and images the the /var/www/html directory as you please. If you want to host multiple sites and domains on Apache, please see Installing Apache on Ubuntu 18.04 / 19.10 with Multiple Domains.
4. Install MySQL
Let’s begin by updating the repository and installing the MySQL package using apt. APT (Advanced Package Tool) is the command line tool used in Ubuntu 18.04 / 19.10 to interact with the packaging system.
You can see below we have two commands combined into one using &&.
sudo apt update && sudo apt install mysql-serverPress y and ENTER when prompted to install the MySQL package.
Once the package installer has finished, we can check to see if the MySQL service is running.
sudo service mysql statusIf running, you will see a green Active status like below.
● mysql.service - MySQL Community Server
Loaded: loaded (/lib/systemd/system/mysql.service; enabled; vendor preset: enabled)
Active: active (running) since Mon 2018-04-02 02:40:59 CEST; 2min 47s ago
Main PID: 18476 (mysqld)
Tasks: 27 (limit: 4915)
CGroup: /system.slice/mysql.service
└─18476 /usr/sbin/mysqld --daemonize --pid-file=/run/mysqld/mysqld.pid

Apr 02 02:40:59 ubuntu1804 systemd[1]: Starting MySQL Community Server...
Apr 02 02:40:59 ubuntu1804 systemd[1]: Started MySQL Community Server.
You may need to press q to exit the service status.
5. Configure MySQL Security
You should now run mysql_secure_installation to configure security for your MySQL server.
sudo mysql_secure_installationIf you created a root password in Step 1, you may be prompted to enter it here. Otherwise you will be asked to create one.
You will be asked if you want to set up the Validate Password Plugin. It’s not really necessary unless you want to enforce strict password policies for some reason.
Securing the MySQL server deployment.

Connecting to MySQL using a blank password.

VALIDATE PASSWORD PLUGIN can be used to test passwords
and improve security. It checks the strength of password
and allows the users to set only those passwords which are
secure enough. Would you like to setup VALIDATE PASSWORD plugin?

Press y|Y for Yes, any other key for No:
Press ENTER here if you don’t want to set up the validate password plugin.
Please set the password for root here.

New password:

Re-enter new password:
If you didn’t create a root password in Step 1, you must now create one here.
Generate a strong password and enter it. Note that when you enter passwords in Linux, nothing will show as you are typing (no stars or dots).
By default, a MySQL installation has an anonymous user,
allowing anyone to log into MySQL without having to have
a user account created for them. This is intended only for
testing, and to make the installation go a bit smoother.
You should remove them before moving into a production
environment.

Remove anonymous users? (Press y|Y for Yes, any other key for No) :
Press y and ENTER to remove anonymous users.
Normally, root should only be allowed to connect from
'localhost'. This ensures that someone cannot guess at
the root password from the network.

Disallow root login remotely? (Press y|Y for Yes, any other key for No) :
Press y and ENTER to disallow root login remotely. This will prevent bots and hackers from trying to guess the root password.
By default, MySQL comes with a database named 'test' that
anyone can access. This is also intended only for testing,
and should be removed before moving into a production
environment.

Remove test database and access to it? (Press y|Y for Yes, any other key for No) :
Press y and ENTER to remove the test database.
Reloading the privilege tables will ensure that all changes
made so far will take effect immediately.

Reload privilege tables now? (Press y|Y for Yes, any other key for No) :
Press y and ENTER to reload the privilege tables.
All done!
As a test, you can log into the MySQL server and run the version command.
sudo mysqladmin -p -u root versionEnter the MySQL root password you created earlier and you should see the following:
mysqladmin Ver 8.42 Distrib 5.7.21, for Linux on x86_64
Copyright (c) 2000, 2018, Oracle and/or its affiliates. All rights reserved.

Oracle is a registered trademark of Oracle Corporation and/or its
affiliates. Other names may be trademarks of their respective
owners.

Server version 5.7.21-1ubuntu1
Protocol version 10
Connection Localhost via UNIX socket
UNIX socket /var/run/mysqld/mysqld.sock
Uptime: 2 hours 34 min 19 sec

Threads: 1 Questions: 15 Slow queries: 0 Opens: 113 Flush tables: 1 Open tables: 106 Queries per second avg: 0.001
You have now successfully installed and configured MySQL!
6. Install PHP
Let’s begin by updating the repository and installing the PHP package using apt. We will also install two more packages libapache2-mod-php and php-mysql, which will allow PHP to communicate with the MySQL database.
sudo apt update && sudo apt install php libapache2-mod-php php-mysqlPress y and ENTER when prompted to install the PHP package.
7. Test PHP
Once the package has finished installing, we can test PHP in the command line.
php -versionIf PHP installed correctly, you should see something similar below:
PHP 7.2.3-1ubuntu1 (cli) (built: Mar 14 2018 22:03:58) ( NTS )
Copyright (c) 1997-2018 The PHP Group
Zend Engine v3.2.0, Copyright (c) 1998-2018 Zend Technologies
with Zend OPcache v7.2.3-1ubuntu1, Copyright (c) 1999-2018, by Zend Technologies
Great! Now, let’s test PHP for Apache.
Create a new file called info.php in your document root directory.
The default document root in Ubuntu 18.04 / 19.10 is /var/www/html/, or if you followed our previous Apache guide on setting up Virtual Hosts, your document root may be in somewhere like /var/www/mytest1.com/public_html where mytest1.com is the name of your own domain.
Once you’ve confirmed the location of you document root directory, create a new file called info.php using the nano text editor.
In this example, we will create a new file in /var/www/html/
sudo nano /var/www/html/info.phpOnce nano editor has opened, paste in the following PHP code. (If using PuTTY, click to right mouse button to paste)
<?php
phpinfo();
Save file and exit. (Press CTRL + X, press Y and then press ENTER)
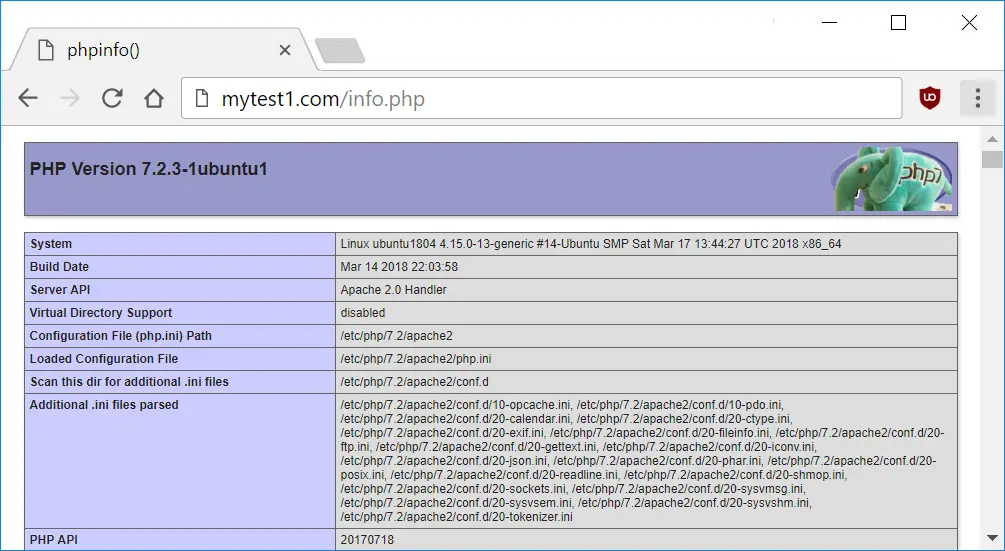
We can now load this file in the browser by going to http://example.com/info.php or http://your_ip/info.php
Tip: If you don’t know you IP, you can find out with:
ip a | grep -Eo 'inet (addr:)?([0-9]*\.){3}[0-9]*' | grep -Eo '([0-9]*\.){3}[0-9]*' | grep -v '127.0.0.1'Below we can see the PHP info page is working correctly.
Once you’ve confirmed PHP is working correctly, it’s important to delete info.php as it contains information that could be useful to hackers.
sudo rm /var/www/html/info.php8. Configure PHP (Optional)
If you plan on uploading files larger than 2MBs through WordPress or similar, you will need to alter the PHP config file and set the max upload size.
Congratulations! You’ve successfully installed and configured a LAMP Stack for Ubuntu 18.04 / 19.10.
What Next?
Now that your Ubuntu 18.04 / 19.10 LAMP web server is up and running, you may want to install phpMyAdmin so you can manage your MySQL server.
To set up a free SSL cert for your domain:
You may want to install and configure an FTP server:
We also have several other articles relating to the day-to-day management of your Ubuntu 18.08 / 19.10 LAMP server
- What to do when you see *** System Restart Required ***
- How to update Ubuntu
- Automatically Back Up Your Web Server Doc Root with Tar and Cron
- Better system monitoring with htop
- Where are the Apache Error and Access Logs Located?
Let me know if this helped. Follow me on Twitter, Facebook and YouTube, or 🍊 buy me a smoothie.
Extremely helpful. Thank you so much
I am completely new to Linux. I followed the examples line for line and everything installed error free. The phpinfo worked as well. When I created a index.php file, and html doc with a php echo statement the php does not render, however the
xxx
does print.
Is there something missing from the install??
Hi. You can’t run PHP code in a .html document. It must be .php
How do I uninstall everything I installed using this guide ?
Very concise and clear instructions. Thanks a lot!
STEP 6 gives me the following :
sudo apt install php libapache2-mod-php php-mysql
Reading package lists… Done
Building dependency tree
Reading state information… Done
libapache2-mod-php is already the newest version (1:7.2+60ubuntu1).
php is already the newest version (1:7.2+60ubuntu1).
php-mysql is already the newest version (1:7.2+60ubuntu1).
0 upgraded, 0 newly installed, 0 to remove and 18 not upgraded.
2 not fully installed or removed.
After this operation, 0 B of additional disk space will be used.
Do you want to continue? [Y/n] Y
Setting up libapache2-mod-php7.2 (7.2.15-0ubuntu0.18.04.2) …
dpkg: error processing package libapache2-mod-php7.2 (–configure):
installed libapache2-mod-php7.2 package post-installation script subprocess returned error exit status 1
dpkg: dependency problems prevent configuration of libapache2-mod-php:
libapache2-mod-php depends on libapache2-mod-php7.2; however:
Package libapache2-mod-php7.2 is not configured yet.
dpkg: error processing package libapache2-mod-php (–configure):
dependency problems – leaving unconfigured
No apport report written because the error message indicates its a followup error from a previous failure.
Errors were encountered while processing:
libapache2-mod-php7.2
libapache2-mod-php
E: Sub-process /usr/bin/dpkg returned an error code (1)
I did :
sudo apt remove –purge libapache2-mod-php7.2
and then again step 6 and it worked .
hi i’d like to know how to install de php7 version on ubuntu?
Please see: Installing PHP for Apache on Ubuntu 18.04
my browser asks user name and password,
when i enter IP address and press enter.
what to do ?
Since I am trying Ubuntu for the first time this tutorial will be quite helpful to me. I have been a Debian user for a long time. Debian performance was really good. This might be because it is lightweight but also might be because the platform I am using for hosting PHP MySQL websites of my client has custom PHP stack with caching.
fantastic
It was very helpful thanks a lot.
And if I see php code instead fuul info about php configuration? What is wrong?
I recommend using Debian instead of Ubuntu for setting up your PHP based stack on. Debian has great support and community. I am using Debian on Cloudways PHP MySQL hosting platform and never had any problem with it.
I’ll definitely check out Debian if I ever have the time. Ubuntu is just the most popular on DigitalOcean right now so that's why all my guides are for that.
On Test PHP step I put info.php in /home/user/ and run the command
php -S localhost:8000
and then in my browser I go to http://localhost:8000/info.php to test php and it works and shows the purple php page.
Is this way also accepted? Is this ever right?
But when I go to this address 192.168.1.100/info.php nothing shows up. Just a blank page. What’s going on and what is wrong?
You seem to have a strange setup. Why are you using port
8000? And your document root should be/var/www/html, not/home/user/Does
192.168.1.100:8000/info.phpwork?great
👍
For completely green developers, is there a link you can add in your step on how to…
Test Apache Step – See the apache page in a browser
Test PHP step – Create and view php files
Not sure what you mean. You want me to create separate pages for those?
i am trying to learn the entire setup. Now that I have all of this installed, how do I go about “seeing what the user sees?”
—
also, kudos on the fast reply
Do you mean a demo page that shows Apache, PHP and MySQL in action? I don’t have anything like that yet, though it’s on the list.
The
info.phppage you create in Step 7 is a good demo of Apache and PHP working together.Hello i have a problem with php, where only the php code shows when I access “http:/localhost/info.php” My browser does not show that screen,
I had the problem with other tutorial, and google to unistall lamp with a purge command. but now my lamp server won’t work.
any thought?
thank you in advaned.
You should try completely removing Apache and PHP again and then reinstalling.
Stop Apache service
Remove PHP
Remove Apache
Clean up
Make sure Apache directory is gone
Now try following this guide again and see if you can get PHP working.
My php file doesnt execute mysql statements ? mysql seems doesnt excute unless by the use of sudo [sudo mysql -u root -p (password)] but with no root privileges in not working in php files ? any tips or can we use mysql as non root . Please help 🙂 Thanks~s
Try installing these two helper packages
Thanks, this was very useful!
FYI there is a small typo in step 4: “…to install the PHP package.” should be “…to install the MySQL package.”.
One optional step could also be added: change the preference from index.html to index.php by editing the order in /etc/apache2/mods-enabled/dir.conf
Thanks, I rely on fresh eyes to spot these things!