Prerequisites
You should use a non-root user account as explained in the Ubuntu 18.04 Initial Server Setup.
You should also have Apache already installed and be able to access a test web page in your browser as explained in our guide Installing Apache on Ubuntu 18.04 Server with Virtual Hosts.
1. Install PHP
Let’s begin by updating the package lists and installing PHP on Ubuntu 18.04. Below we have two commands separated by &&. The first command will update the package lists to ensure you get the latest version and dependencies for PHP. The second command will then download and install PHP. Press y and ENTER when asked to continue.
sudo apt update && sudo apt install phpPress y and ENTER when prompted to install the PHP package.
If you want to use PHP in conjunction with MySQL, you should install libapache2-mod-php and php-mysql
sudo apt update && sudo apt install libapache2-mod-php php-mysql2. Test PHP
Once the package has finished installing, we can test PHP in the command line.
php -versionIf PHP installed correctly, you should see something similar below:
PHP 7.2.3-1ubuntu1 (cli) (built: Mar 14 2018 22:03:58) ( NTS )
Copyright (c) 1997-2018 The PHP Group
Zend Engine v3.2.0, Copyright (c) 1998-2018 Zend Technologies
with Zend OPcache v7.2.3-1ubuntu1, Copyright (c) 1999-2018, by Zend Technologies
Great! Now, let’s test PHP for Apache.
Create a new file called info.php in your document root directory.
The default document root in Ubuntu 18.04 is /var/www/html/, or if you followed our previous Apache guide on setting up Virtual Hosts, your document root may be in somewhere like /var/www/mytest1.com/public_html where mytest1.com is the name of your own domain.
Once you’ve confirmed the location of you document root directory, create a new file called info.php using the nano text editor.
In this example, we will create a new file in /var/www/html/
sudo nano /var/www/html/info.phpOnce nano editor has opened, paste in the following PHP code. (If using PuTTY, click to right mouse button to paste)
<?php
phpinfo();
Save file and exit. (Press CTRL + X, press Y and then press ENTER)
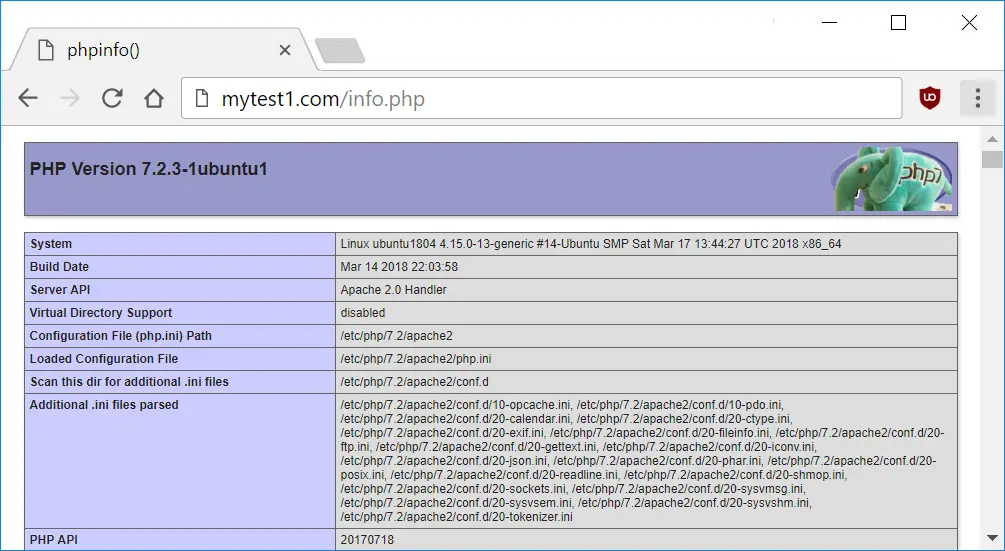
We can now load this file in the browser by going to http://example.com/info.php or http://your_ip/info.php
Tip: If you don’t know you IP, you can find out with:
ip a | grep -Eo 'inet (addr:)?([0-9]*\.){3}[0-9]*' | grep -Eo '([0-9]*\.){3}[0-9]*' | grep -v '127.0.0.1'Below we can see the PHP info page is working correctly.
Once you’ve confirmed PHP is working correctly, it’s important to delete info.php as it contains information that could be useful to hackers.
sudo rm /var/www/html/info.php3. Configure PHP (Optional)
If you plan on uploading files larger than 2MBs through WordPress or similar, you will need to alter the PHP config file and set the max upload size.
What Next?
Now that you have PHP up and running, you can begin setting up a MySQL database server and phpMyAdmin.
Let me know if this helped. Follow me on Twitter, Facebook and YouTube, or 🍊 buy me a smoothie.