Prerequisites
You should be using a non-root user with sudo privileges as explained in Ubuntu 18.04 Initial Server Setup.
You should also have your LAMP stack already installed and serving web pages before continuing with this guide. Please see Installing a LAMP Stack (Apache, MySQL, PHP) on Ubuntu 18.04 / 19.10.
1. Install phpMyAdmin
Let’s begin by updating the package lists and installing phpMyAdmin on Ubuntu 18.04 / 19.10. Below we have two commands separated by &&. The first command will update the package lists to ensure you get the latest version and dependencies for phpMyAdmin. The second command will then download and install phpMyAdmin. Press y and ENTER when asked to continue.
sudo apt update && sudo apt install phpmyadminThe order of the following screens in the phpMyAdmin Package configuration may vary depending on your setup.
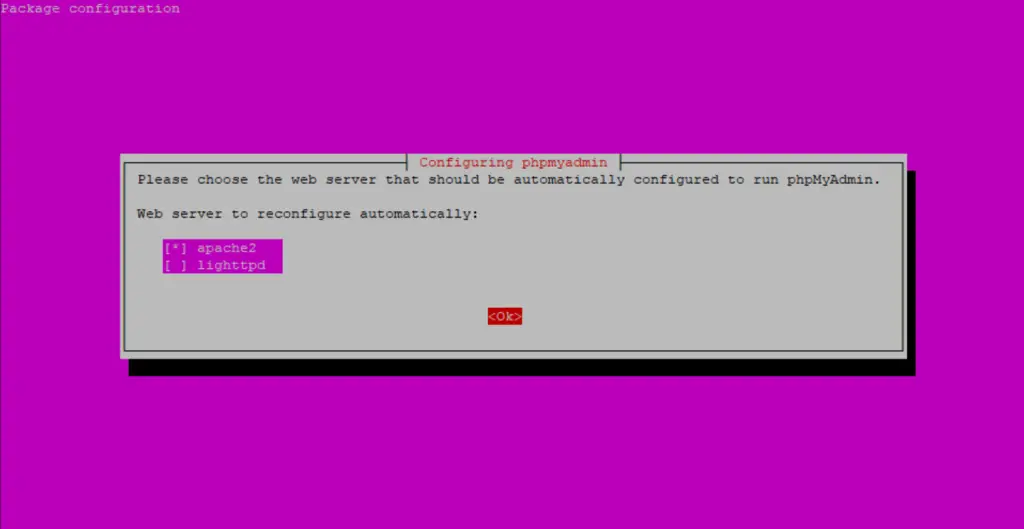
If you are prompted to choose a web server, press SPACE to put a star [*] beside apache2, then press TAB to highlight OK and press ENTER.

Select Yes and press ENTER to install and configure the database.
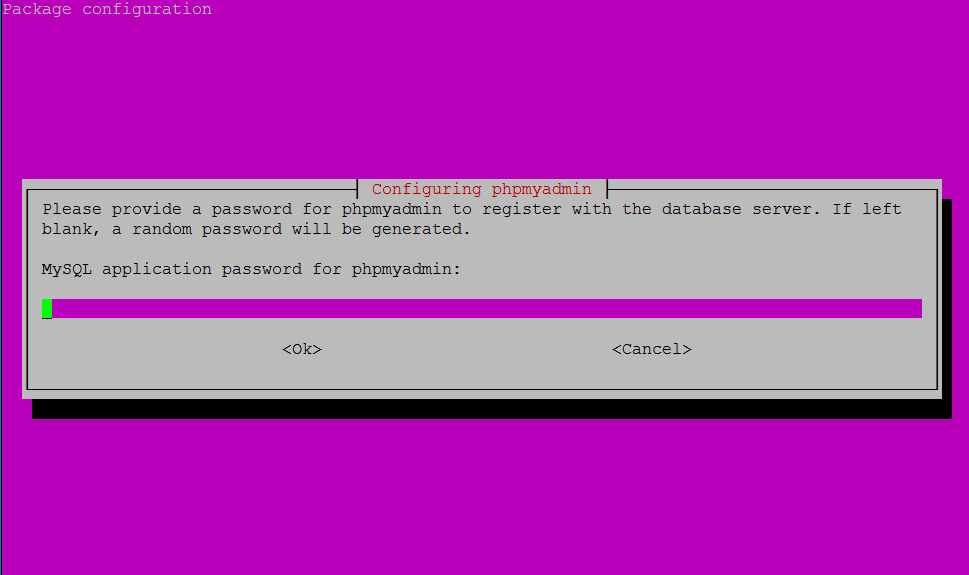
The MySQL application password is only used internally by phpMyAdmin to communicate with MySQL. You can leave this blank and a password will be generated automatically. Just press ENTER to continue.
2. Test phpMyAdmin
You should now be able to access the phpMyAdmin web interface by visiting your server’s domain name or public IP address followed by /phpmyadmin. e.g. http://example.com/phpmyadmin or http://192.168.1.10/phpmyadmin
If you don’t have a domain name yet or don’t know your IP, you can find out with:
ip a | grep -Eo 'inet (addr:)?([0-9]*\.){3}[0-9]*' | grep -Eo '([0-9]*\.){3}[0-9]*' | grep -v '127.0.0.1'
You will have set up the root user and password when installing MySQL for the first time. However, remote login might be disabled for root. If you get an error “Access denied for user ‘root’@’localhost'”, you should continue to Step 3 to create a superuser just for phpMyAdmin.
3. Create MySQL User
If you weren’t able to log in as root above, you can now create a superuser account just for phpMyAdmin.
In terminal, log into MySQL as root. You may have created a root password when you installed MySQL for the first time or the password could be blank, in which case you can just press ENTER when prompted for a password.
sudo mysql -p -u rootNow add a new MySQL user with the username of your choice. In this example we are calling it pmauser (php my admin user). Make sure to replace password_here with your own (generate a password).
The % symbol tells MySQL to allow this user to log in from anywhere remotely. If you want heightened security, you could replace this with an IP address.
CREATE USER 'pmauser'@'%' IDENTIFIED BY 'password_here';Now we will grant superuser privileges to our new user pmauser.
GRANT ALL PRIVILEGES ON *.* TO 'pmauser'@'%';Now exit MySQL.
exitYou should now be able to access phpMyAdmin using this new user account.
If you would like to set up some additional security for phpMyAdmin, continue to the next step.
4. Obscure phpMyAdmin URL
Bots and attackers continuously scan web servers for the default phpMyAdmin login page, so it is recommended that you change the URL to something else.
In this example we are going to change it from example.com/phpmyadmin to example.com/pmahidden.
Open the phpMyAdmin configuration file for Apache using the nano text editor.
sudo nano /etc/apache2/conf-available/phpmyadmin.conf
Change the Alias from /phpmyadmin to /pmahidden – you can change this to whatever you want.
# phpMyAdmin default Apache configuration

Alias /pmahidden /usr/share/phpmyadmin
Save and close nano (Press CTRL + X and then press y and ENTER to save changes)
Now you must reload the Apache service for changes to take effect.
sudo service apache2 reloadYou should now be able to access phpMyAdmin at example.com/pmahidden
5. Protect with .htpasswd
We can further protect the phpMyAdmin login page with .htpasswd. This adds another line of defence against bots and hackers.
5.1 Allow .htaccess Overrides
To set up .htpasswd, we must first change the phpMyadmin Apache configuration file to allow .htaccess Overrides.
Open the config file in nano text editor.
sudo nano /etc/apache2/conf-available/phpmyadmin.confAdd AllowOverride All underneath DirectoryIndex index.php
<Directory /usr/share/phpmyadmin>
    Options SymLinksIfOwnerMatch
    DirectoryIndex index.php
    AllowOverride All
Save and close nano (Press CTRL + X and then press y and ENTER to save changes)
Now reload the Apache service.
sudo service apache2 reload5.2 Set up .htpasswd
We are going to create a new .htaccess file in the phpMyAdmin install directory using the nano text editor.
sudo nano /usr/share/phpmyadmin/.htaccessPaste in the following. (Use the right mouse button to paste if using PuTTY on Windows)
AuthType Basic
AuthName "Restricted Access"
AuthUserFile /etc/phpmyadmin/.htpasswd
Require valid-user
Save and close nano (Press CTRL + X and then press y and ENTER to save changes)
We can now generate the .htpasswd file using the htpasswd tool.
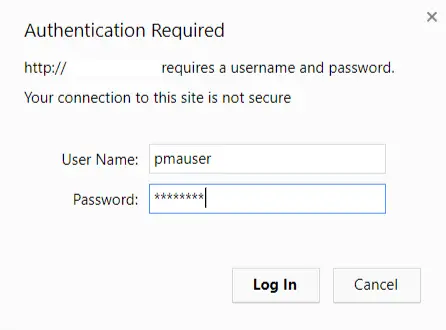
In this example, we are creating a new user called pmauser (php my admin user), though you can change this to whatever you want.
sudo htpasswd -c /etc/phpmyadmin/.htpasswd pmauserYou will be asked to enter a new password twice (generate a password).
That’s it, you’re done! Visit phpMyAdmin in your browser and you should now be prompted to enter login details.
6. Manually Update phpMyAdmin (Optional)
The repositories often don’t give you the latest releases of phpMyAdmin. If you would like to manually upgrade to the the latest version, see:
What Next?
By now you will have successfully implemented your LAMP stack (Apache/MySQL/PHP) for Ubuntu 18.04 / 19.10 and can administer MySQL through phpMyAdmin.
You may now want to configure SSL for you domain or set up an FTP server.
- Configuring Let’s Encrypt SSL Cert for Apache on Ubuntu 18.04 / 19.10
- Installing an FTP server (vsftpd) on Ubuntu 18.04 / 19.10
Let me know if this helped. Follow me on Twitter, Facebook and YouTube, or 🍊 buy me a smoothie.
Ubuntu 19.10 does not contain the phpmyadmin package.
Please try
sudo add-apt-repository ppa:phpmyadmin/ppasudo apt-get updatesudo apt-get install phpmyadminOn ubuntu version 19.04 if I try to install it from the shell, it answers me like this: The phpmyadmin package has no versions available, but is named by another
package. This could indicate that the package is missing, obsolete
or is available only within another source
hey man, can’t we use root as user name and blank password ? like the one they did in XAMPP. (while using xampp, if we go to localhost/phpmyadmin we never see the login page. i hope you know it. like that one, can’t we skip the login autentication and use the root and the blank password while configuring phpmyadmin ? atleast the root user thing ?)
i have installed phpmyadmin correctly but when i try to check it via localhost/phpmyadmin ,it says NOT FOUND the URL was not found in this server.
what can be a problem here?
Try this fix:
sudo ln -s /etc/phpmyadmin/apache.conf /etc/apache2/conf-available/phpmyadmin.conf
sudo a2enconf phpmyadmin
sudo service apache2 reload
Bro Kenzzy.. You’re my hero! thanks
Thank You for the Tutorial,
It is working perfectly!
But There are some issues, It is not possible to create database, the message is
Create database
No Privileges
Thanks very much for these steps. i followed it all through and got it working. Great job
I followed your tutorial and i got is working perfectly but I was surprised that i couldnt access phpmyadmin with the user (firmtech) i earlier created. i get the errors below:
#1045 – Access denied for user ‘firmtech’@’localhost’ (using password: YES)
mysqli_real_connect(): (HY000/1045): Access denied for user ‘phpmyadmin’@’localhost’ (using password: YES)
Connection for controluser as defined in your configuration failed.
mysqli_real_connect(): (HY000/1045): Access denied for user ‘firmtech’@’localhost’ (using password: YES)
@devanswe.rs
Having followed the tutorial I get the same login problem as above.
Any suggestions?
It is OK, I fixed it
Didn’t use the semi colon after the two commands to setup the user!
The best tutorial aside the LAMP. Thanks
👍
Well written topic. Thanks!
I’m new learner LAMP stack, every your page i visit all very usefull. IT is not my major, So some purpose of changing in this article i don’t know that task to do?
Thank you very much…. Very helpful
Thank you very much for your unique tutorial that I found working, until then I had been trying with mariadb and it always caused me a connection error 🙂
very helpfull, very good
I am having a problem when i’m trying to enter to the website by using the ip address/phpmyadmin, it says “The requested URL /phpmyadmin was not found on this server.”
Don’t worry i solved. I used this steps https://askubuntu.com/questions/668734/the-requested-url-phpmyadmin-was-not-found-on-this-server
Sir,
I am having an issue in which it couldn’t found the phpmyadmin repository. Here is the error:-
E: unable to locate package phpmyadmin
I also refer to this thread but seems to no avail.
https://askubuntu.com/questions/1062526/unable-to-locate-package-phpmyadmin-on-ubuntu-server-18-04
Your help is much appreciated
Are you using a non-root user account?
Is your LAMP stack installed?
If you’ve done the above, try updating the server:
When done, try installing phpmyadmin again.
Login without a password is forbidden by configuration (see AllowNoPassword)
how to solve this problem??
When I login to phpMyAdmin I have some annoying warning:
It’s a compatibility issue with PHP 7.2 and phpMyAdmin.
Please see: Problem with phpMyAdmin and PHP 7.2: “Warning in ./libraries/sql.lib.php#613 count(): Parameter must be an array or an object that implements Countable”
I get the following error when I follow your guide, and the same when I retry.
Nicely done. Thank you so much.
No probs 🙂
Can i use the same process if im using nginx?
We have an article here for Nginx: