Prerequisites
You should be using a non-root user with sudo privileges as explained in Ubuntu 20.04 Initial Server Setup.
You should also have your LAMP stack for Ubuntu 20.04 already installed and serving web pages before continuing with this guide.
1. Install phpMyAdmin
Let’s begin by updating the package lists and installing phpMyAdmin on Ubuntu 20.04.
Below we have two commands separated by &&. The first command will update the package lists to ensure you get the latest version and dependencies for phpMyAdmin. I am also including a few extra extensions, which are recommended for functionality and performance reasons.
sudo apt update && sudo apt install phpmyadmin php-mbstring php-zip php-gd php-json php-curlPress y and ENTER when asked to continue.
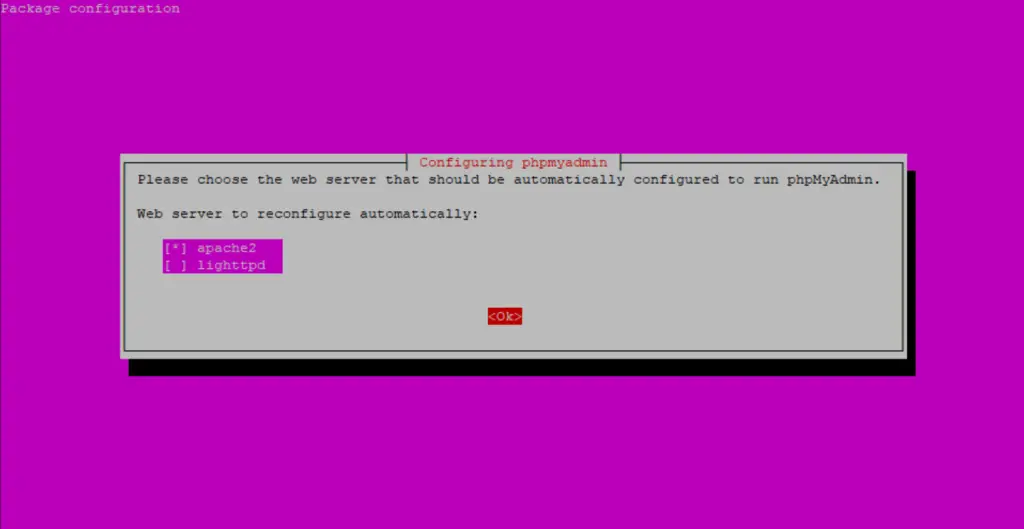
1.1. Select apache2
If you are prompted to choose a web server, press SPACE to put a star [*] beside apache2, then press TAB to highlight OK and press ENTER.
1.2. Configure Database
Select Yes and press ENTER to install and configure the database.

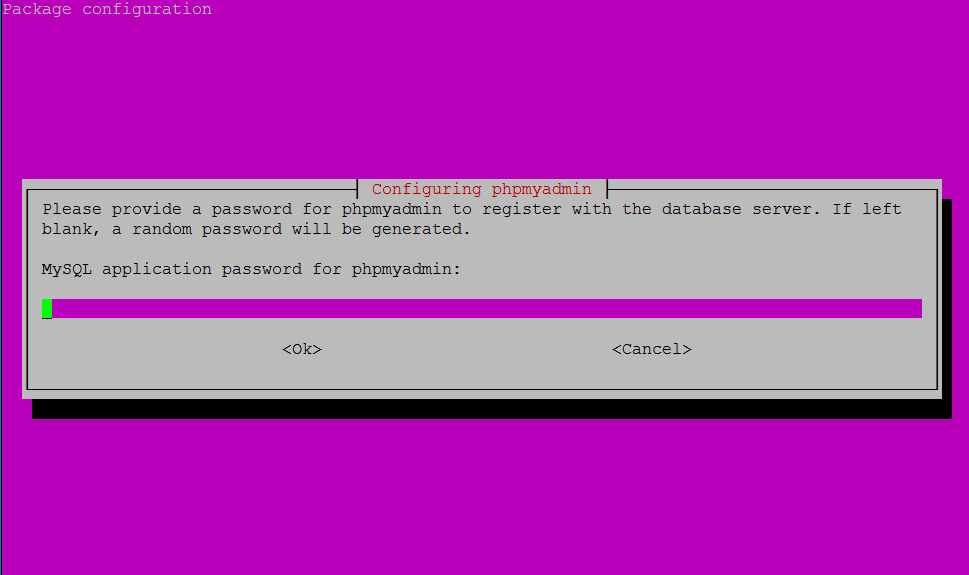
1.3. Application Password
The MySQL application password is used internally by phpMyAdmin to communicate with MySQL and it is not recommended that you use it to log into phpMyAdmin. You can leave this blank and a password will be generated automatically.
Press ENTER to continue.
Finally, enable the mbstring PHP extension and restart Apache.
sudo phpenmod mbstringsudo service apache2 reload2. Test phpMyAdmin
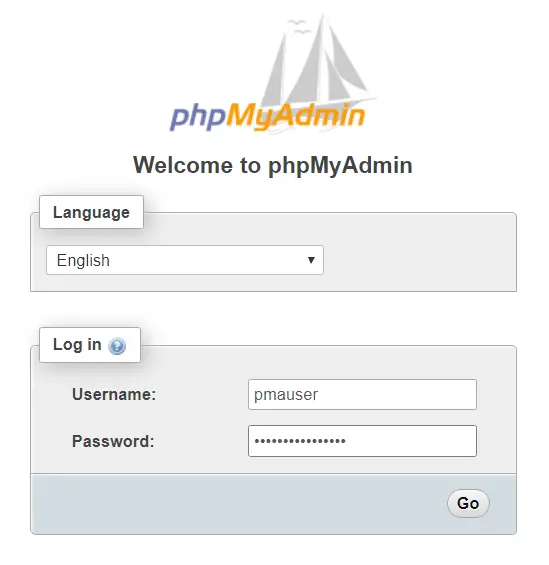
You should now be able to access the phpMyAdmin web interface by visiting your server’s domain name or public IP address followed by /phpmyadmin. e.g. http://example.com/phpmyadmin or http://192.168.1.10/phpmyadmin
If you don’t have a domain name yet or don’t know your IP, you can find out with:
ip addr show eth0 | grep inet | awk '{ print $2; }' | sed 's/\/.*$//'

MySQL root Account and phpMyAdmin
In MySQL 5.7 and above, you will not be able to log into phpMyAdmin using the MySQL root account and will get an error “Access denied for user ‘root’@’localhost'”. Instead, you should create a new superuser account just for phpMyAdmin. If you want force MySQL to allow root login via phpMyAdmin, see: Can’t log into phpMyAdmin with root
3. Create MySQL Superuser
In terminal, log into MySQL using the root account. You should be able to log straight in with sudo without having to enter your root password.
sudo mysqlIf you are having problems logging in this way, try the command below to force password prompt. You may have created a root password when you installed MySQL for the first time or the password could be blank. If you have forgotten your MySQL root password, see: Reset MySQL Root Password
sudo mysql -u root -pOnce logged in, add a new MySQL superuser with the username of your choice. In this example we are calling it pmauser. Click here to generate a strong password and replace password_here below with it.
CREATE USER 'pmauser'@'localhost' IDENTIFIED WITH mysql_native_password BY 'password_here';Now grant superuser privileges to our new user pmauser.
GRANT ALL PRIVILEGES ON *.* TO 'pmauser'@'localhost' WITH GRANT OPTION;Exit MySQL.
exitYou should now be able to access phpMyAdmin using this new user account.
It is strongly recommended that you set up some additional security for phpMyAdmin in the steps below.
4. Obscure phpMyAdmin URL
Bots continuously scan web servers for the default phpMyAdmin login page, so it is recommended that you change the URL to something else.
In this example we are going to change it from example.com/phpmyadmin to example.com/pmahidden.
Open the phpMyAdmin configuration file for Apache using the nano text editor.
sudo nano /etc/apache2/conf-available/phpmyadmin.confChange the Alias from /phpmyadmin to /pmahidden – you can change this to whatever you want.
# phpMyAdmin default Apache configuration

Alias /pmahidden /usr/share/phpmyadmin
Save and exit (press CTRL + X, press Y and then press ENTER)
Now you must reload the Apache service for changes to take effect.
sudo service apache2 reloadYou should now be able to access phpMyAdmin at example.com/pmahidden
5. Protect with .htpasswd
We can further protect the phpMyAdmin login page with .htpasswd. This adds another line of defence against bots and attackers.
5.1. Allow .htaccess Overrides
To set up .htpasswd, we must first change the phpMyadmin Apache configuration file to allow .htaccess Overrides.
Open the config file in nano text editor.
sudo nano /etc/apache2/conf-available/phpmyadmin.confAdd AllowOverride All underneath DirectoryIndex index.php
<Directory /usr/share/phpmyadmin>
    Options SymLinksIfOwnerMatch
    DirectoryIndex index.php
    AllowOverride All
Save and exit (press CTRL + X, press Y and then press ENTER)
Now reload the Apache service.
sudo service apache2 reload5.2. Set up .htpasswd
We are going to create a new .htaccess file in the phpMyAdmin install directory using the nano text editor.
sudo nano /usr/share/phpmyadmin/.htaccessPaste in the following. (Use the right mouse button to paste if using PuTTY on Windows)
AuthType Basic
AuthName "Restricted Access"
AuthUserFile /etc/phpmyadmin/.htpasswd
Require valid-user
Save and exit (press CTRL + X, press Y and then press ENTER)
We can now generate the .htpasswd file using the htpasswd tool.
In this example, we are creating a new user called pmauser (php my admin user), though you can change this to whatever you want.
sudo htpasswd -c /etc/phpmyadmin/.htpasswd pmauserYou will be asked to enter a new password twice (Click here to generate a strong password).
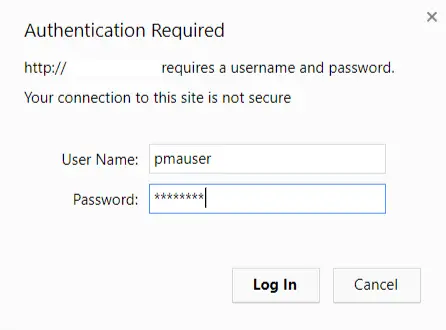
That’s it, you’re done! Visit phpMyAdmin in your browser and you should now be prompted to enter login details.
What Next?
By now you will have successfully implemented your LAMP stack (Apache/MySQL/PHP) for Ubuntu 20.04 and can administer MySQL through phpMyAdmin.
You may now want to configure SSL for you domain or set up an FTP server.
- Configuring Let’s Encrypt SSL Cert for Apache on Ubuntu 20.04
- Installing an FTP server (vsftpd) on Ubuntu 20.04
- How to Configure SFTP for a Web Server Document Root
Manually Update phpMyAdmin (Optional)
The repositories often don’t give you the latest releases of phpMyAdmin. If you would like to manually upgrade to the the latest version, see:
Let me know if this helped. Follow me on Twitter, Facebook and YouTube, or 🍊 buy me a smoothie.
Hi Dev, i’ve got an error when i enable mbstring with “sudo phpenmod mbstring” and it is the message “/usr/sbin/phpenmod: 31: .: Can’t open /usr/lib/php/php-helper”.
Can you help me with this problem? Any answer I would appreciate. Thanks
Hello,
everything works perfectly, thank you very much.
See you
Thomas
Hello sir! I installed phpmyadmin according to your method but the phpmyadmin login page could not be opened after installation. Show’Not Found’ how to fix it, please
Same problem,
I follow all tutorial in this blog (installing apache2, mysql, Multi PHP).
when access phpmyadmin page showing 404 not found.
how to solve this issue?
I have the same problem but my issue is in step 1.1, i miss out the step “press the space to highlight an asterisk beside apache2”. Instead i press enter straight away.
I found a way to reconfigure the phpmyadmin, but i also waiting for the author to brief on more appropriate way to solve this if this is the scenario
sudo nano /etc/apache2/apache2.conf
ADD THE FOLLOWING LINE AT THE BOTTOM OF FILE..
Include /etc/phpmyadmin/apache.conf
save and quit
Now it should work fine
This worked great!!!
Sir, small correction
GRANT ALL PRIVILEGES ON *.* TO 'pmauser'@'%' WITH GRANT OPTION;this is giving error: you are not allowed create user with grant
Solution
GRANT ALL PRIVILEGES ON *.* TO 'pmauser'@'%';I am using latest version mysql on ubuntu 20
Thanks sir!
This is a change in MySQL 8. When I was doing this guide, MySQL 5.7 was in the repositories.
Thanks sir!
ERROR 1410 (42000): You are not allowed to create a user with GRANT, hello DevAnswers eu can help me
Hi John. Apologies. It’s sort of difficult to troubleshoot without further information.
This error means your MySQL account does not have the necessary privileges to use
GRANT.Are you sure you are logging into MySQL using your
rootaccount?sudo mysql -u rootOnce in MySQL, what does this command return?
mysql > SHOW GRANTS;hello yes i’m using root
Sorry about this, it is a change in MySQL 8. I have updated the guide.
CREATE USER 'pmauser'@'localhost' IDENTIFIED BY 'password_here';Now grant superuser privileges to our new user pmauser.
GRANT ALL PRIVILEGES ON *.* TO 'pmauser'@'localhost';Does that work for you?
sorry for the delay, yes it works thank you very much
Hello writer,
I have been struggling to set up the LAMP stack on my ubuntu. I went to so many sites and failed. Specifically to set up the phpmyadmin. Thank you from the bottom of my heart for setting up these pages for Ubuntu’s latest OS version. God bless you !
And God bless you! Thanks for the comment.
GRANT ALL PRIVILEGES ON . TO ‘pmauser’@’%’ WITH GRANT OPTION; HELP ME ERROR 1410 (42000): You are not allowed to create a user with GRANT
Please try
GRANT ALL PRIVILEGES ON *.* TO 'pmauser'@'localhost';without WITH GRANT OPTION;
Hi, when trying to install it gives me error in php-gettext (sudo apt update && sudo apt install phpmyadmin php-mbstring php-gettext)
Can you give me more details about the error?
php-gettext is not released yet in Focal servers https://launchpad.net/ubuntu/focal/+source/php-gettext