Prerequisites
You should use a non-root user account with sudo privileges. Please see the Initial server setup for Ubuntu 20.04 guide for more details.
1. Install Nginx
The first step in creating a LEMP stack on Ubuntu 20.04 is by updating the package lists and installing Nginx. Type y and ENTER if prompted.
sudo apt update && sudo apt install nginxOnce installed, check to see if the Nginx service is running.
sudo service nginx statusIf Nginx is running correctly, you should see a green Active state below.
<span class="green">●</span> nginx.service - A high performance web server and a reverse proxy server
     Loaded: loaded (/lib/systemd/system/nginx.service; enabled; vendor preset: enabled)
     Active: <span class="green">active (running)</span> since Mon 2020-04-27 23:05:58 UTC; 2min 26s ago
       Docs: man:nginx(8)
   Main PID: 2433 (nginx)
      Tasks: 2 (limit: 1137)
     Memory: 5.1M
     CGroup: /system.slice/nginx.service
             ├─2433 nginx: master process /usr/sbin/nginx -g daemon on; master_process on;
             └─2434 nginx: worker process

Apr 27 23:05:58 ubuntu systemd[1]: Starting A high performance web server and a reverse proxy server...
Apr 27 23:05:58 ubuntu systemd[1]: Started A high performance web server and a reverse proxy server.
You may need to press q to exit the service status.
2. Configure Firewall
If you haven’t already done so, it is recommended that you enable the ufw firewall on Ubuntu 20.04 and add a rule for Nginx. Before enabling ufw firewall, make sure you add a rule for SSH, otherwise you may get locked out of your server if you’re connected remotely.
sudo ufw allow OpenSSHIf you get an error “ERROR: could find a profile matching openSSH”, this probably means you are not configuring the server remotely and can ignore it.
Now add a rule for Nginx.
sudo ufw allow 'Nginx Full'Output:
Rule added
Rule added (v6)
Enable ufw firewall.
sudo ufw enablePress y when asked to proceed.
Now check the firewall status.
sudo ufw statusStatus: active
To Action From
-- ------ ----
OpenSSH ALLOW Anywhere
<span class="red">Nginx Full ALLOW Anywhere</span>
OpenSSH (v6) ALLOW Anywhere (v6)
<span class="red">Nginx Full (v6) ALLOW Anywhere (v6)</span>The Nginx component of your LEMP Stack on Ubuntu 20.04 should now be ready to serve web pages.
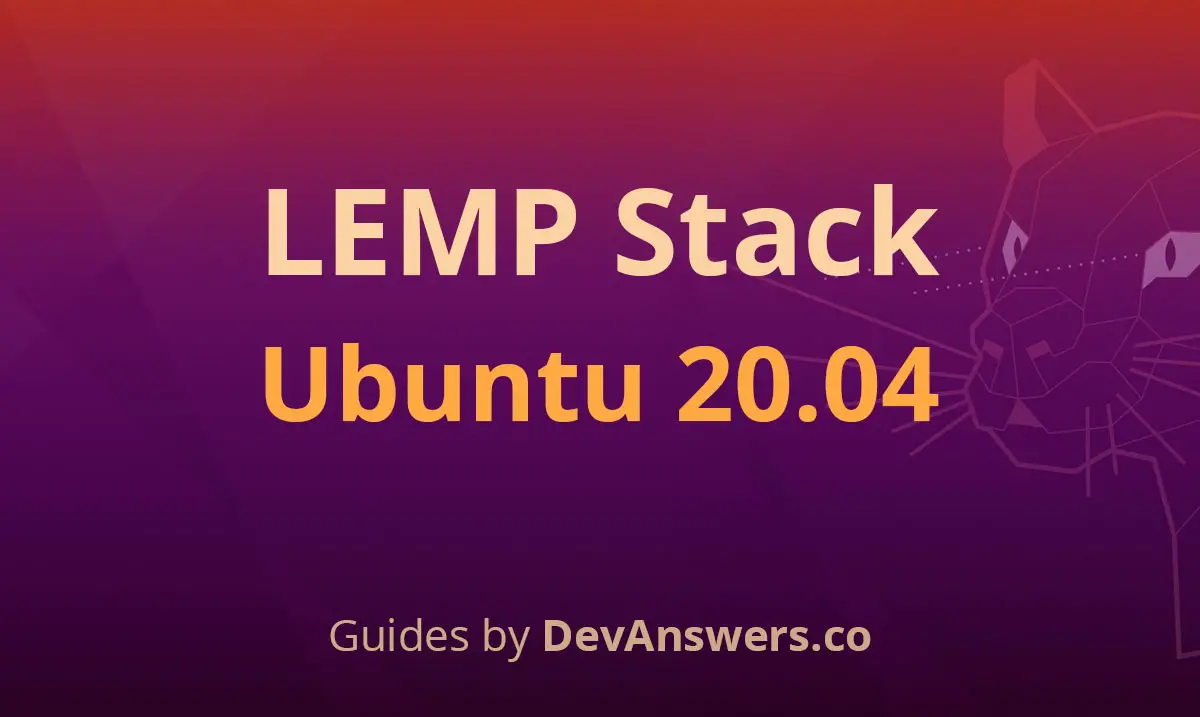
3. Test Nginx
Go to your web browser and visit your domain or IP. If you don’t have a domain name yet and don’t know your IP, you can find out by running:
ip addr show eth0 | grep inet | awk '{ print $2; }' | sed 's/\/.*$//'
You can find this Nginx default welcome page in the document root directory /var/www/html. To edit this file in nano text editor:
sudo nano /var/www/html/index.nginx-debian.htmlTo save and close nano, press CTRL + X and then press y and ENTER to save changes.
Your Nginx web server is ready to go. You can now add your own html files and images the the /var/www/html directory as you please.
4. Install MySQL
The next component of the LEMP Stack on Ubuntu 20.04 is MySQL.
Let’s begin by updating the repository and installing the MySQL package using apt.
sudo apt update && sudo apt install mysql-serverPress y and ENTER when prompted to install the MySQL package.
Once the package installer has finished, we can check to see if the MySQL service is running.
sudo service mysql statusIf running, you will see a green Active status like below.
<span class="green">●</span> mysql.service - MySQL Community Server
     Loaded: loaded (/lib/systemd/system/mysql.service; enabled; vendor preset: enabled)
     Active: <span class="green"><strong>active (running)</strong></span> since Mon 2020-04-02 02:40:59 CEST; 2min 47s ago
   Main PID: 18476 (mysqld)
     Status: "Server is operational"
      Tasks: 27 (limit: 4915)
     CGroup: /system.slice/mysql.service
             └─18476 /usr/sbin/mysqld

Apr 02 02:40:59 ubuntu2004 systemd[1]: Starting MySQL Community Server...
Apr 02 02:40:59 ubuntu2004 systemd[1]: Started MySQL Community Server.
You may need to press q to exit the service status.
5. Configure MySQL Security
You should now run mysql_secure_installation to configure security for your MySQL server.
sudo mysql_secure_installation5.1. Validate Password Component (Optional)
You will be asked if you want to set up the Validate Password Plugin. It’s not really necessary unless you want to enforce strict password policies for some reason.
Securing the MySQL server deployment.

Connecting to MySQL using a blank password.

VALIDATE PASSWORD COMPONENT can be used to test passwords
and improve security. It checks the strength of password
and allows the users to set only those passwords which are
secure enough. Would you like to setup VALIDATE PASSWORD component?

<span class="red">Press y|Y for Yes, any other key for No:</span>
Press ENTER if you don’t want to set up the validate password plugin.
5.2. Create Root Password
If you didn’t create a root password in Step 1, you must now create one here.
Please set the password for root here.

<span class="red">New password:

Re-enter new password:</span>
Generate a strong password and enter it. Note that when you enter passwords in Linux, nothing will show as you are typing (no stars or dots).
5.3. Remove Anonymous Users
You will next be asked to remove anonymous users.
By default, a MySQL installation has an anonymous user,
allowing anyone to log into MySQL without having to have
a user account created for them. This is intended only for
testing, and to make the installation go a bit smoother.
You should remove them before moving into a production
environment.

<span class="red">Remove anonymous users? (Press y|Y for Yes, any other key for No) :</span>
Press y and ENTER to remove anonymous users.
5.4. Disable Remote Root Login
Normally, root should only be allowed to connect from
'localhost'. This ensures that someone cannot guess at
the root password from the network.

<span class="red">Disallow root login remotely? (Press y|Y for Yes, any other key for No) :</span>
Press y and ENTER to disallow root login remotely.
5.5. Remove Test Database
By default, MySQL comes with a database named 'test' that
anyone can access. This is also intended only for testing,
and should be removed before moving into a production
environment.

<span class="red">Remove test database and access to it? (Press y|Y for Yes, any other key for No) :</span>
Press y and ENTER to remove the test database.
5.6. Reload Privilege Tables
Reloading the privilege tables will ensure that all changes
made so far will take effect immediately.

<span class="red">Reload privilege tables now? (Press y|Y for Yes, any other key for No) :</span>
Press y and ENTER to reload the privilege tables.
You’re all done! 😀
5.7. Test MySQL Service
You can now log into the MySQL server. Because you are running this command as sudo, this will automatically log into MySQL using the MySQL root account. If you are prompted for a password, enter your Linux root account password, not the MySQL one.
sudo mysqlOutput:
Welcome to the MySQL monitor.  Commands end with ; or \g.
Your MySQL connection id is 15
Server version: 8.0.19-0ubuntu5 (Ubuntu)

Copyright (c) 2000, 2020, Oracle and/or its affiliates. All rights reserved.

Oracle is a registered trademark of Oracle Corporation and/or its
affiliates. Other names may be trademarks of their respective
owners.

Type 'help;' or '\h' for help. Type '\c' to clear the current input statement.

mysql>
To exit MySQL, type exit and press ENTER.
exitYou have now successfully installed and secured the MySQL component of your LEMP Stack on Ubuntu 20.04.
6. Install PHP
The final component of your LEMP Stack on Ubuntu 20.04 is PHP.
Unlike Apache, Nginx does not contain native PHP processing. For that we have to install PHP-FPM (FastCGI Process Manager). FPM is an alternative PHP FastCGI implementation with some additional features useful for heavy-loaded sites.
You should add Ubuntu’s universe repository before installing php-fpm to ensure you get the correct package.
sudo add-apt-repository universeNow update the package lists and install PHP-FPM on Ubuntu 20.04. We will also install php-mysql to allow PHP to communicate with the MySQL database. Press y and ENTER when asked to continue.
sudo apt update && sudo apt install php-fpm php-mysqlOnce installed, check the PHP version.
php --versionIf PHP was installed correctly, you should see something similar to below.
<span class="red">PHP 7.4.3</span> (cli) (built: Mar 26 2020 20:24:23) ( NTS )
Copyright (c) The PHP Group
Zend Engine v3.4.0, Copyright (c) Zend Technologies
    with Zend OPcache v7.4.3, Copyright (c), by Zend Technologies
Above we are using PHP version 7.4, though this may be a later version for you depending on which package was in the repository.
Depending on what version of Nginx and PHP you install, you may need to manually configure the location of the PHP socket that Nginx will connect to.
List the contents for the directory /var/run/php/
ls /var/run/php/You should see a few entries here.
total 4
lrwxrwxrwx 1 root     root     30 Apr 27 23:28 php-fpm.sock -> /etc/alternatives/php-fpm.sock
-rw-r--r-- 1 root     root      5 Apr 27 23:28 php7.4-fpm.pid
srw-rw---- 1 www-data www-data  0 Apr 27 23:28 <span class="red">php7.4-fpm.sock</span>
Above we can see the socket is called php7.4-fpm.sock. Remember this as you may need it for the next step.
7. Configure Nginx for PHP
We now need to make some changes to our Nginx server block.
The location of the server block may vary depending on your setup. By default, it is located in /etc/nginx/sites-available/default.
Edit the file in nano.
sudo nano /etc/nginx/sites-available/default7.1. Prioritize index.php
Press CTRL + W and search for index.html.
Now add index.php before index.html
index <span class="red">index.php</span> index.html index.htm index.nginx-debian.html;7.2. Server Name
Press CTRL + W and search for the line server_name.
Enter your server’s IP here or domain name if you have one.
server_name <span class="red">YOUR_DOMAIN_OR_IP_HERE</span>;7.3. PHP Socket
Press CTRL + W and search for the line location ~ \.php.
You will need to uncomment some lines here by removing the # signs before the four lines marked in red below.
Also ensure value for fastcgi_pass socket path is correct. For example, if you installed PHP version 7.4, the socket should be: /var/run/php/php7.4-fpm.sock
If you are unsure which socket to use here, exit out of nano and run ls /var/run/php/
<span class="red">location ~ \.php$ {
                include snippets/fastcgi-php.conf;</span>
        #
        #       # With php-fpm (or other unix sockets):
                <span class="red">fastcgi_pass unix:/var/run/php/<strong>php7.4-fpm.sock</strong>;</span>
        #       # With php-cgi (or other tcp sockets):
        #       fastcgi_pass 127.0.0.1:9000;
        <span class="red">}
Make sure to remove the # sign before the closing bracket } in red above.
7.4. Save and Test
Once you’ve made the necessary changes, save and close (Press CTRL + X, then press y and ENTER to confirm save)
Now check the config file to make sure there are no syntax errors.
sudo nginx -tOutput:
nginx: the configuration file /etc/nginx/nginx.conf syntax is ok
nginx: configuration file /etc/nginx/nginx.conf test is successful
If no errors, you can reload the Nginx config.
sudo service nginx reload8. Test PHP
To see if PHP is working correctly on Ubuntu 20.04, create a new PHP file called info.php in the document root directory. By default, this is located in /var/www/html/, or if you set up multiple domains in a previous guide, it may be located in somewhere like /var/www/mytest1.com/public_html
Once you have the correct document root directory, use the nano text editor to create a new file info.php
sudo nano /var/www/html/info.phpType or paste the following code into the new file.
phpinfo();Save and exit (press CTRL + X, press Y, then press ENTER)
You can now view this page in your web browser by visiting your server’s domain name or public IP address followed by /info.php: http://your_domain_or_IP/info.php
ip addr show eth0 | grep inet | awk '{ print $2; }' | sed 's/\/.*$//'phpinfo() outputs a large amount of information about the current state of PHP. This includes information about PHP compilation options and extensions, the PHP version and server information.
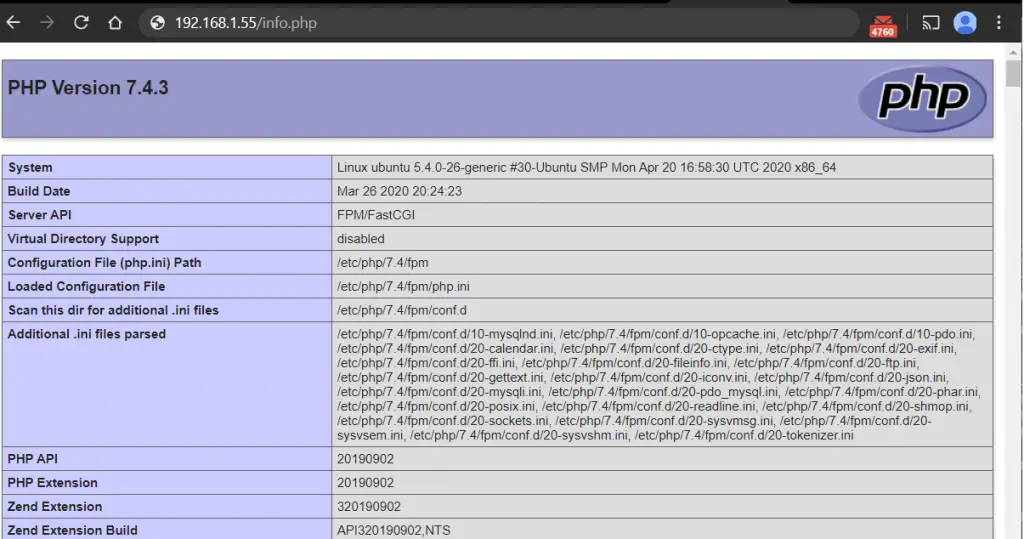
You have now successfully installed PHP-FPM for Nginx on Ubuntu 20.04.
Make sure to delete info.php as it contains information about the web server that could be useful to attackers.
sudo rm /var/www/html/info.phpWhat Next?
Now that your Ubuntu 20.04 LEMP web server is up and running, you may want to install phpMyAdmin so you can manage your MySQL server.
To set up a free SSL cert for your domain:
You may want to install an FTP server or configure SFTP for your doc root.
- Installing an FTP Server with vsftpd (Ubuntu 20.04)
- How to Configure SFTP for a Web Server Document Root
We also have several other articles relating to the day-to-day management of your Ubuntu 20.04 LEMP server.
- How To Back Up Your Web Server Doc Root with Tar and Cron
- How to Back Up MySQL Databases and Automate with Cron
- How to Update Ubuntu 20.04
- What to do when you see *** System Restart Required ***
- Better system monitoring with htop
- Where are the Nginx Error and Access Logs Located?
Let me know if this helped. Follow me on Twitter, Facebook and YouTube, or 🍊 buy me a smoothie.
how to unzip file in nginx sever please reply
sudo apt install unzip
sudo unzip filename.zip
hope it helps
nginx: [emerg] “fastcgi_pass” directive is not allowed here in /etc/nginx/sites-enabled/default:60
facing this error in 7.3. PHP Socket
Could you post the contents of
/etc/nginx/sites-available/defaultand I’ll have a look?There is a small error in the value of fastcgi_pass. It must be /var/run/php/php7.2-fpm.sock. and not /var/run/php/php7.4-fpm.sock