Prerequisites
You should be using a non-root user with sudo privileges as explained in Ubuntu 20.04 / 20.10 Initial Server Setup.
You should also have your LEMP stack for Ubuntu 20.04 / 20.10 already installed and serving web pages before continuing with this guide.
1. Install phpMyAdmin
Let’s begin by updating the package lists and installing phpMyAdmin for Nginx on Ubuntu 20.04 / 20.10.
sudo apt update && sudo apt install phpmyadminPress y and ENTER when asked to continue.
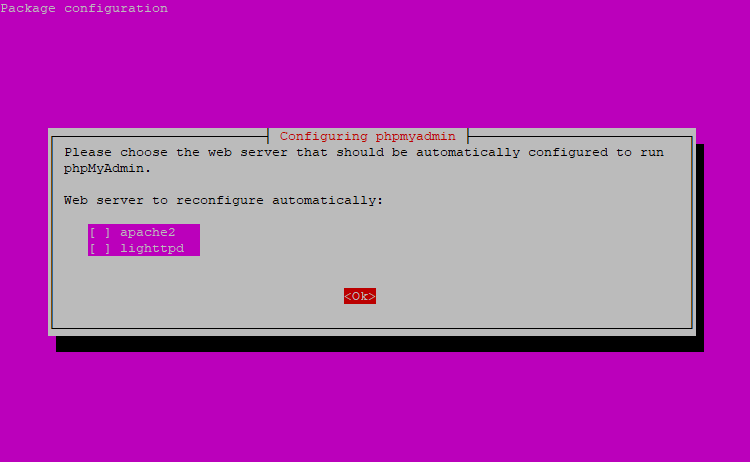
1.1. Select Nothing
If you are prompted to choose a web server like below, as there is no option for Nginx, press TAB and then ENTER to continue without selecting a web server.
1.2. Configure Database
Select Yes and press ENTER to install and configure the database.

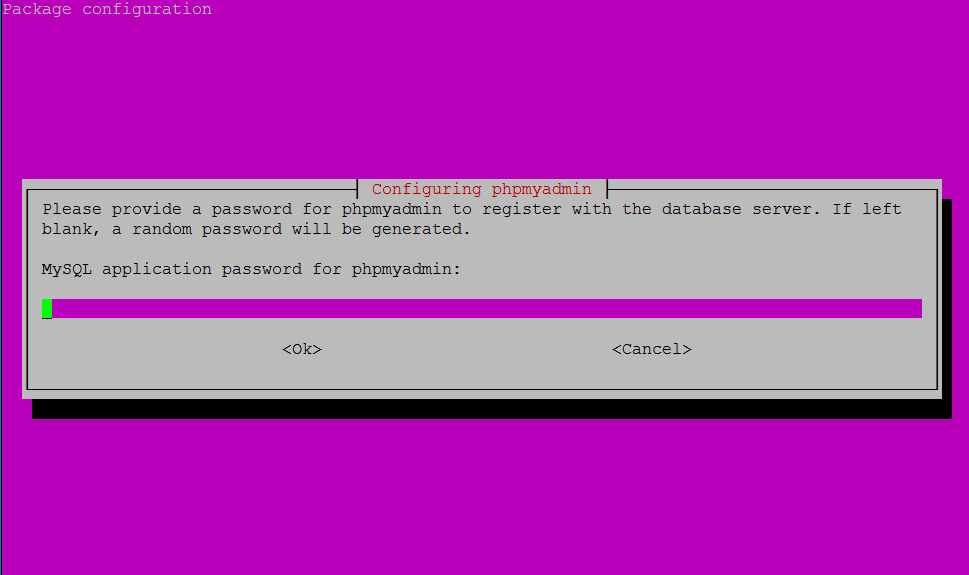
1.3. Application Password
The MySQL application password is used internally by phpMyAdmin to communicate with MySQL and it is not recommended that you use it to log into phpMyAdmin. You can leave this blank and a password will be generated automatically.
Press ENTER to continue.
2. Create Symbolic Link
In order for Nginx to serve the phpMyAdmin files correctly, we must create a symbolic link from the phpMyAdmin directory /usr/share/phpmyadmin to the Nginx document root directory.
The default location of the Nginx document root in Ubuntu 20.04 / 20.10 should be /var/www/html/, though it could be different depending on your setup. If you followed a previous guide for setting up multiple domains for Nginx, your document root may be located in somewhere like /var/www/example.com/public_html.
Once you have confirmed your document root, let’s create a symbolic link from the phpMyAdmin directory to your document root. Here we will assume your document root is /var/www/html/ and we will simply add phpmyadmin to the end of it. This will allow us to access phpMyAdmin at example.com/phpmyadmin.
sudo ln -s /usr/share/phpmyadmin /var/www/html/phpmyadmin3. Test phpMyAdmin
You should now be able to access the phpMyAdmin web interface by visiting your server’s domain name or public IP address followed by /phpmyadmin. e.g. http://example.com/phpmyadmin or http://192.168.1.10/phpmyadmin
If you don’t have a domain name yet or don’t know your IP, you can find out with:
ip addr show eth0 | grep inet | awk '{ print $2; }' | sed 's/\/.*$//'
MySQL root Account and phpMyAdmin
In MySQL 5.7 and above, you will not be able to log into phpMyAdmin using the MySQL root account and will get an error “Access denied for user ‘root’@’localhost'”. Instead, you should create a new superuser account just for phpMyAdmin. If you want force MySQL to allow root login via phpMyAdmin, see: Can’t log into phpMyAdmin with root
4. Create MySQL Superuser
In terminal, log into MySQL using your MySQL root password.
You may have created a root password when you installed MySQL for the first time or the password could be blank. If you have forgotten your MySQL root password, see: Reset MySQL Root Password
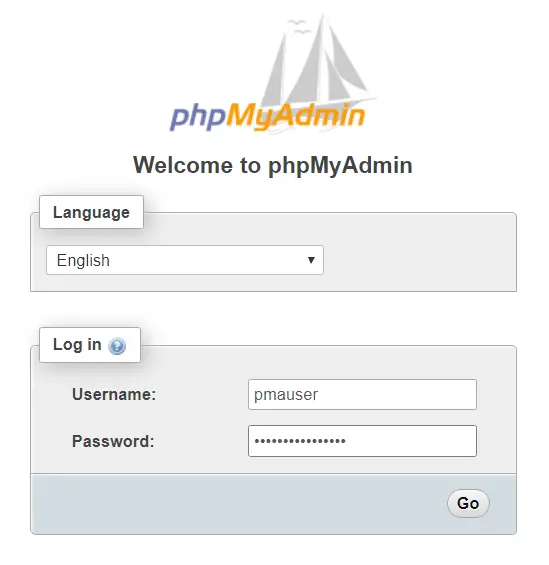
sudo mysql -u root -pOnce logged in, add a new MySQL superuser with the username of your choice. In this example we are calling it pmauser. Click here to generate a strong password and replace password_here below with it.
CREATE USER 'pmauser'@'localhost' IDENTIFIED BY 'password_here';Now grant superuser privileges to our new user pmauser.
GRANT ALL PRIVILEGES ON *.* TO 'pmauser'@'localhost';Exit MySQL.
exitYou should now be able to access phpMyAdmin using this new user account.
It is strongly recommended that you set up some additional security for phpMyAdmin in the steps below.
5. Obscure phpMyAdmin URL (Recommended)
Bots and attackers continuously scan web servers for the phpMyAdmin login page, so it is recommended that you change the URL to something else.
In this example we are going to change it from example.com/phpmyadmin to example.com/pma_hidden, though you can change it to whatever you want.
In step 2, we created a symbolic link in the document root /var/www/html/phpmyadmin
All we need to do is to rename this symbolic link, in this example, to: pma_hidden. Make sure you enter the correct document root here. The default is /var/www/html though it may be something like /var/www/example.com/public_html/ on your server.
sudo mv /var/www/html/phpmyadmin /var/www/html/pma_hiddenYou should now be able to access phpMyAdmin at example.com/pma_hidden
6. Secure phpMyAdmin (Recommended)
To provide an additional layer of security, we can set up authentication in Nginx.
We will now install apache2-utils, which can generate the .htpasswd file that works with both Nginx and Apache.
sudo apt install apache2-utilsOnce installed, we can generate the .htpasswd file. Simply change username to whatever username you want. Generate a password and keep it safe.
sudo htpasswd -c /etc/nginx/.htpasswd usernameThere should now be a .htpasswd file containing your username and encrypted password. You can check with:
cat /etc/nginx/.htpasswdYou should see something like username:$apr1sdfsdf4435sdtskLfWmmg1sfdsdgg4
We now need to add two directives to our Nginx configuration file. The location of the config file may vary depending on your setup, though the default is usually in /etc/nginx/sites-available/default. If you set up multiple domains in a previous guide, your config file may be located in somewhere like /etc/nginx/sites-available/example.com
This this example, we will assume the config file is in /etc/nginx/sites-available/default. Open the file to edit.
sudo nano /etc/nginx/sites-available/defaultScroll down and look for the location blocks and paste in a new block underneath them with the name of your obscured phpMyAdmin folder, in this example pma_hidden.
location /pma_hidden {
        auth_basic "Restricted Access";
        auth_basic_user_file /etc/nginx/.htpasswd;
}
Save file and exit (press CTRL + X, press Y and then press ENTER).
Check that the Nginx config file is valid, otherwise the server could crash on restart.
sudo nginx -tIf valid, reload Nginx config.
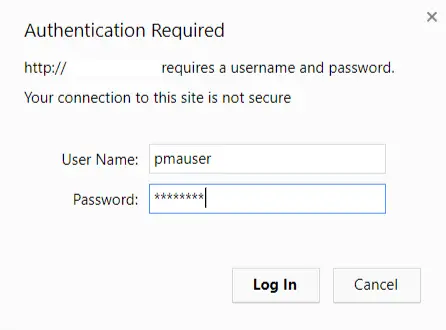
sudo service nginx reloadNow when visiting example.com/pma_hidden, you should be presented with an authentication window.
You’re all done!
What Next?
By now you will have successfully implemented your LEMP stack for Ubuntu 20.04 / 20.10 and can administer MySQL through phpMyAdmin.
You may now want to configure SSL for you domain or set up an FTP server.
- Configuring Let’s Encrypt SSL Cert for Nginx on Ubuntu 20.04 / 20.10
- Installing an FTP server (vsftpd) on Ubuntu 20.04 / 20.10
- How to Configure SFTP for a Web Server Document Root
Manually Update phpMyAdmin (Optional)
The repositories often don’t give you the latest releases of phpMyAdmin. If you would like to manually upgrade to the the latest version, see:
Let me know if this helped. Follow me on Twitter, Facebook and YouTube, or 🍊 buy me a smoothie.
Keeps throwing 401 error.
If I remove the auth lines I can access my obscure link, but as soon as I add auth the page gets broken with return error “401”.
Hi Devanswers,
I am installing LEMP, while installing phpmyadmin, i got an error which is related to password.
My password length is of 24 character and i use same password which i use in MYSQL
as i insert password in “1.3. Application Password” i shows an error message below.
“”Configuring phpmyadmin
An error occurred while installing the database:
mysq1 said: ERROR 1819 (HY000) at line 1: your password does not satisfy the current
policy requirements . your options are :
abort — causes the operation to fail; you will need to downgrade,
reinstall, reconfigure this package, or otherwise manually intervene
to continue using it. This will usually also impact your ability to
install other packages until the installation failure is resolved.
retry — prompts once more with all the configuration questions
(including ones you may have missed due to the debconf priority
setting) and makes another attempt at performing the operation.
retry (skip questions) — Immediately attempts the operation again,
skipping all questions. This is normally useful only if you have
solved the underlying problem since the time the error occurred.
ignore — continues the operation ignoring dbconfig—common errors.
This will usually leave this package without a functional database.
Next step for database installation:
abort
retry
retry (skip questions)
ignore
ok “”
after this i just remove phpmyadmin by following command.
sudo apt-get remove phpmyadmin
sudo apt-get purge phpmyadmin
sudo apt-get autoremove
Please suggest something i am from non cs-it background, what i do next related to password setting such as length of password, uppercase, lowercase, special character.
Please reply here.
I have tried this but new location is not working, still opens domain.com/phpmyadmin.
what could be the reason behind moving phpmyadmin to different folder not working.
Dear Devanswers,
Thank you so much for this tutorial. However, after completing the first paragraph and entering step Access phpMyAdmin Dashboard, the link http://www.donutnetwerk.nl/phpmyadmin doesn’t work. You can check it out for yourself.
I already rebooted nginx with sudo systemctl reload nginx.
What can I do to get this working?
Kind regards,
Kato von Katz