Update Feb 2020
I’m sorry to announce that Mailgun have recently removed free access to Routes for new members and have completely redesigned their interface. There is no longer a free way to forward email through your domain to Gmail using Mailgun. This means the article below is now completely redundant.
I will do some research to find another free solution and update this article accordingly. So far, people in the comments below are recommending forwardemail.net as a possible free alternative. Though as I haven’t tested it yet, I cannot vouch for its reliability.
An updated article with some free and cheap solution is forthcoming!
In the meantime, if you know of any free solutions, please let me know in the comments.
Free, but with Limits
Mailgun has an allowance of 10,000 free emails per month (that’s around 330 emails per day), which is more than enough for personal email or a small website. Gmail has a similar limit of “500 recipients per day” – if you send any more than that, your Gmail account will be blocked for 24 hours.
If you intend on sending more than 330 email per day, this guide is perhaps not for you, and you probably won’t find any email service that would allow such volume for free.
1. Sign Up for Mailgun
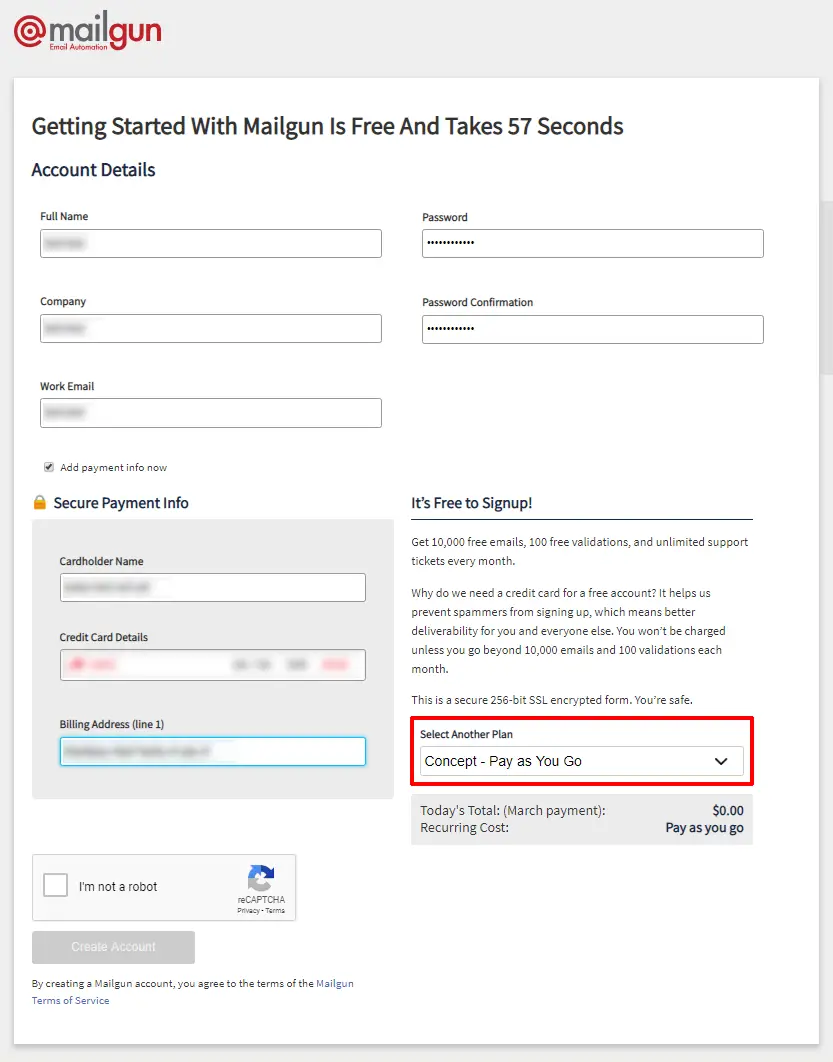
Sign up for Mailgun here. You will need a valid credit card in order to sign up, but you will not be charged as long as you don’t go over the limit. This credit card requirement is to prevent spammers from signing up for multiple accounts.
When signing up, select Concept – Pay As You Go.
You will receive an email with instructions on how to verify your account.
2. Add Domain and DNS Records
Let’s begin by adding the domain. In this guide, I am setting up the domain for this very blog devanswe.rs.
Note that the screengrabs in this article may look different if Mailgun updates or re-designs their control panel, but the process should be similar.
When you sign up for Mailgun for the first time, you should be prompted to add a new domain as part of the sign up process.
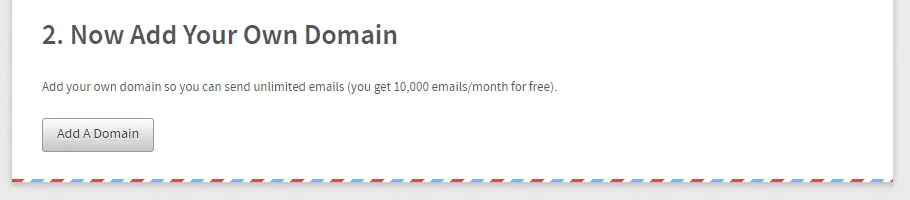
Enter your domain name. Do not use a subdomain as recommended by Mailgun.
If you have already signed up for Mailgun, you can add a new domain by clicking Domains in the main menu and then Add New Domain.

You should now see the screen below. If not, you may need to scroll to the top of the page.
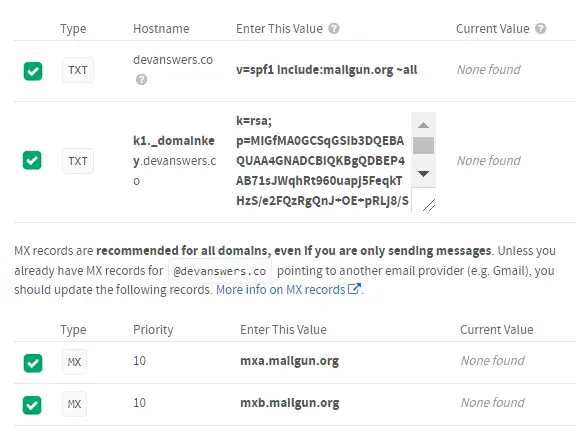
You will now need to add some DNS records to your domain in order to verify it. Follow the instructions provided by Mailgun for your particular host.
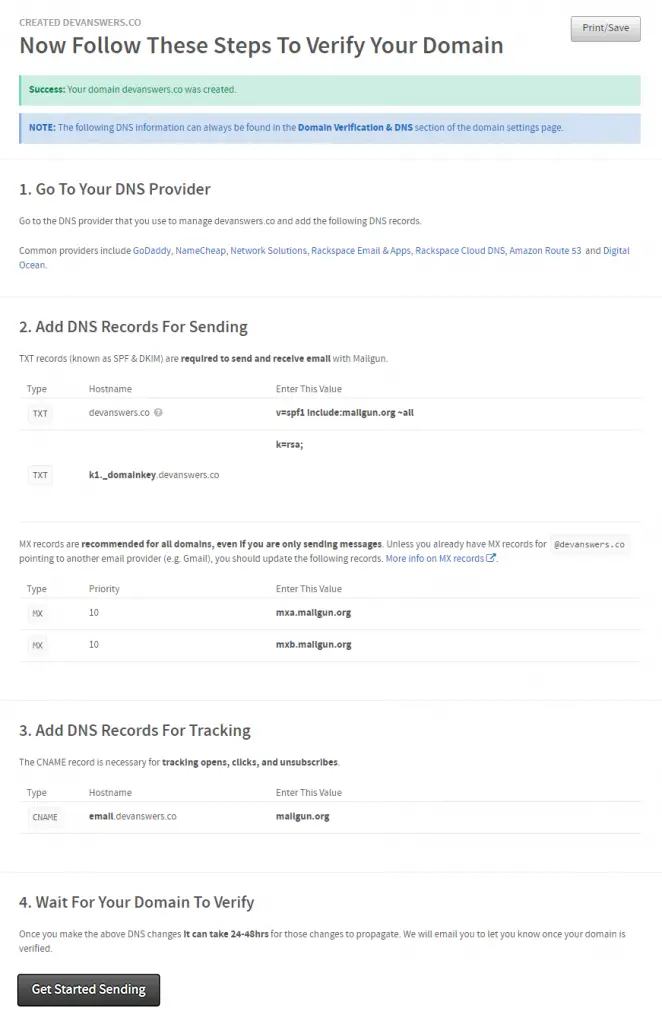
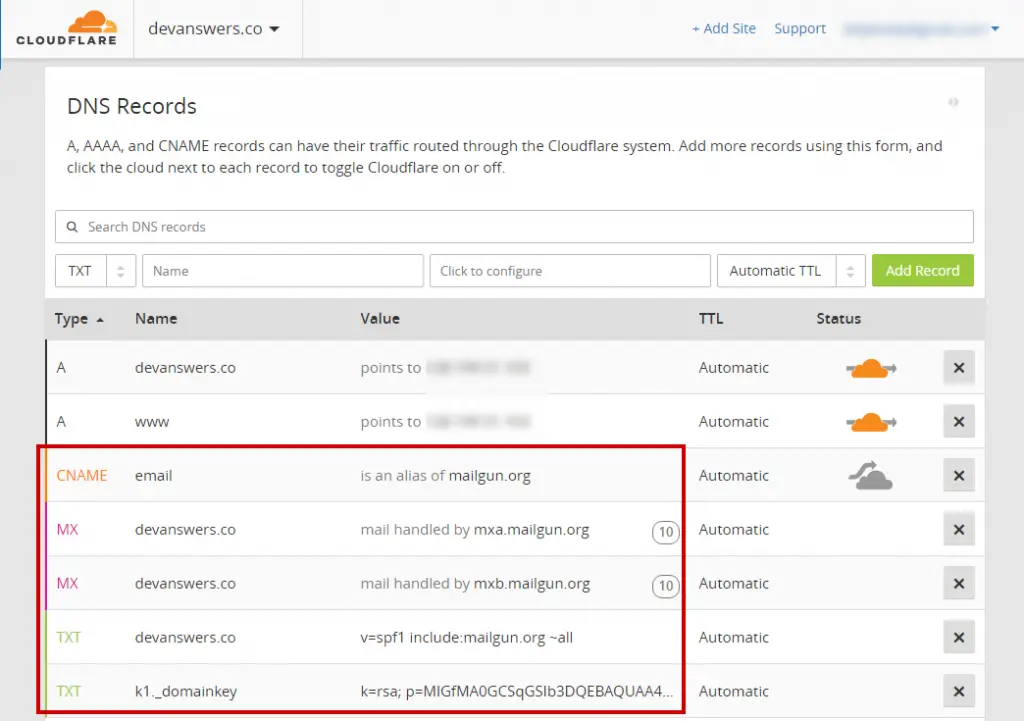
In my case, I am using Cloudflare to manage DNS for this domain. Below I am adding five new DNS records.
Once you have configured your DNS records, return to Mailgun and click Get Started Sending.
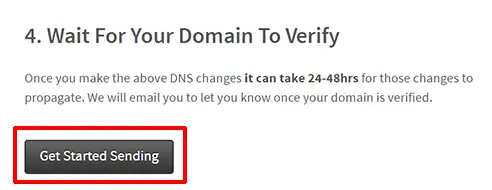
Once clicked, you may need to scroll to the top of the page to see Domain Information.
It may take several hours for the new DNS records to propagate. Until then, you may see an Unverified state.

If your domain hasn’t been verified, scroll down the page to Domain Verification and DNS and periodically click Check DNS Records Now.

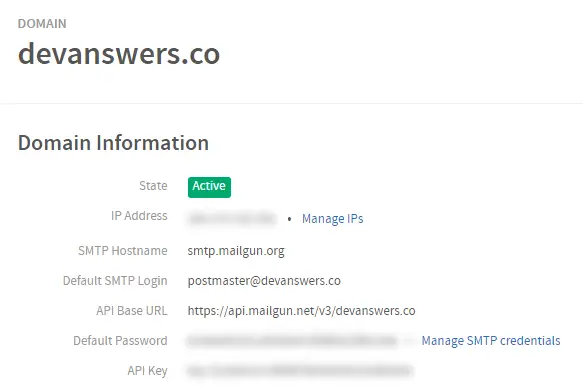
Once the domain has been verified, the states should all change to green.
Scroll to the top of the page to Domain Information and the state should be Active.
If you are still seeing an orange or red state, you will need to check back periodically and click Check DNS Records Now until the icons turn green. When they do, you can continue with this guide.
3. Create Route
Routes allow us to set up email forwarding rules. Here we will instruct Mailgun to forward emails from our domain to Gmail.
Click Routes in the top menu and click Create A Route.
In this example, I want to catch all emails sent to [email protected] and forward them to my personal Gmail account [email protected].
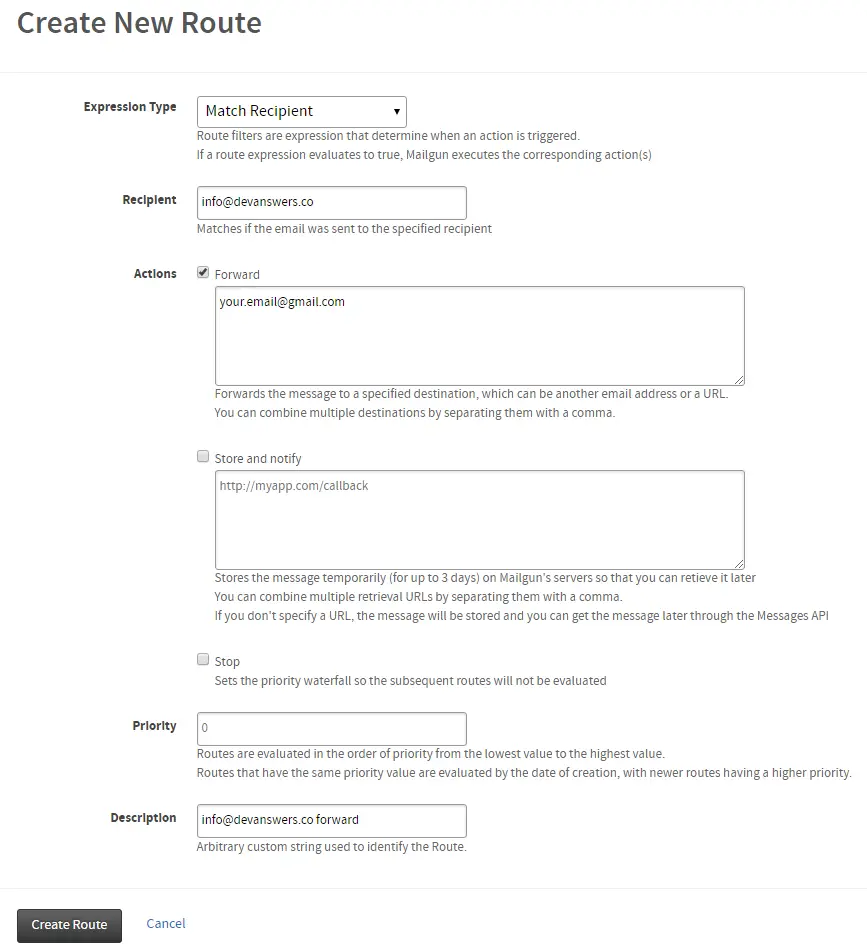
Enter the following details into the Create New Route page:
- Expression Type: Match Recipient
- Recipient: Enter your domain’s email you want to match, in this example [email protected]
- Actions: Check Forward and enter the Gmail address that you want to forward email to.
- Store and Notify: Leave unchecked.
- Stop: Leave unchecked.
- Priority: 0
- Description: Enter anything here to describe the route, in this example “[email protected] forward”
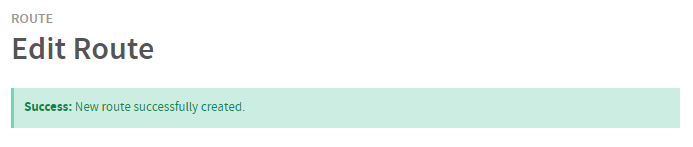
Click Create Route.
Your new forwarding route to Gmail should now be ready.
4. Add SMTP Credentials
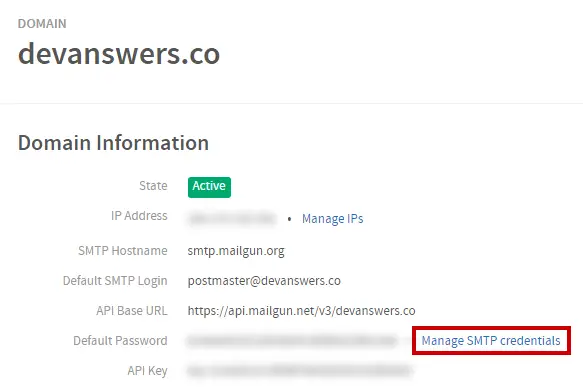
Click Domains in the top navigation and choose your domain from the list.
Under Domain Information, click Manage SMTP credentials.
Click New SMTP Credentials and enter the login username and password. (Generate a password)

In this example, I want to forward email from [email protected], so I’ve entered info as the login for consistency.
Click Create Credential.
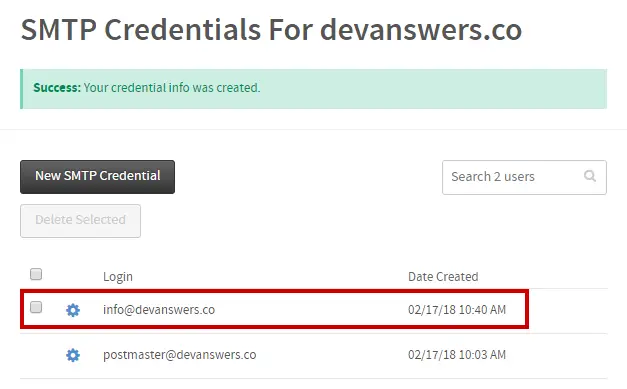
Above we can see our new credential. We can now use this in Gmail to connect over SMTP.
5. Set up Gmail
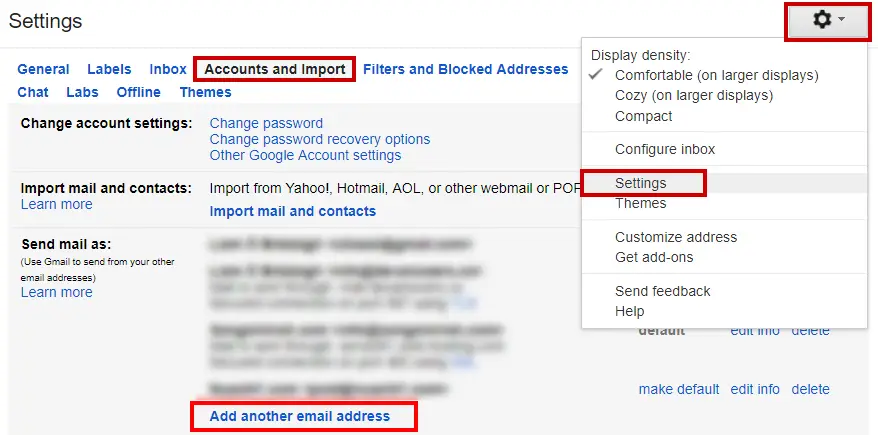
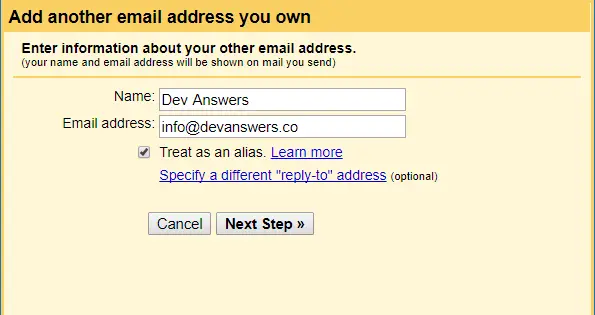
Log in to Gmail and go to Settings > Accounts and Import and click Add another email address.
Enter your name and email address, and check Treat as an alias, then click Next Step.
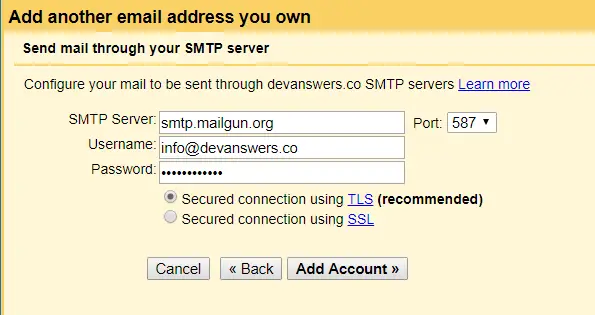
- Enter smtp.mailgun.org as SMTP Server. Port is 587.
- Enter the username (email address) and password your created in Mailgun earlier.
- Toggle Secured connection using TLS.
Click Add Account
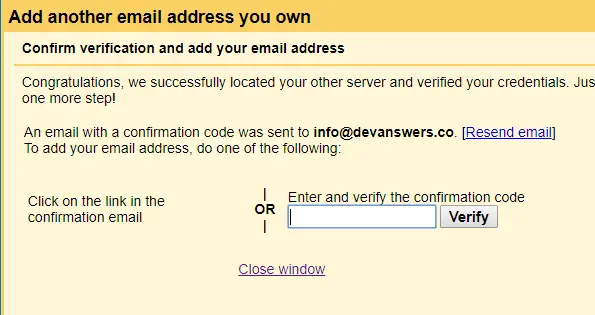
You should now receive an email from Google with a verification number. Enter it here and click Verify.
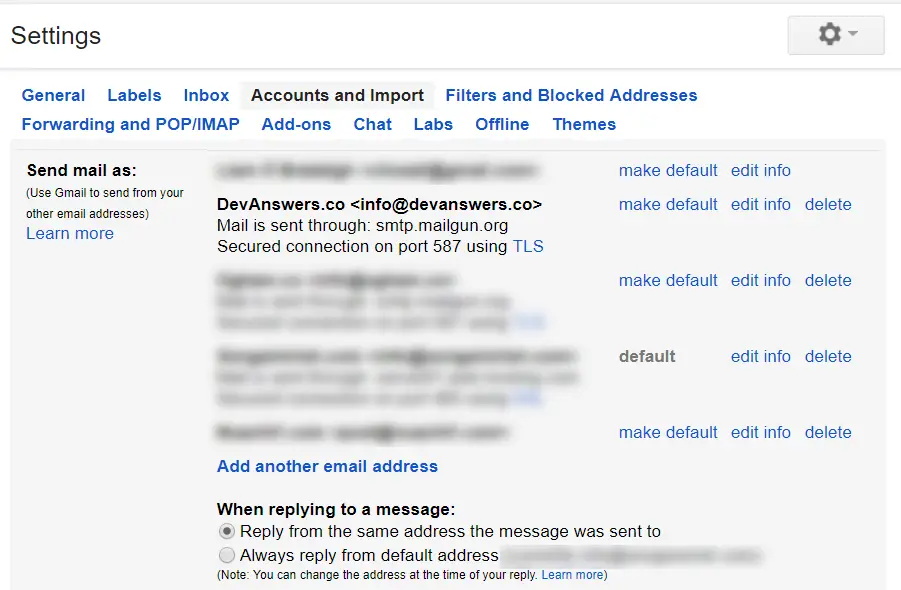
Your account should now appear in the Account and Import tab in Gmail.
If you want Gmail to always send email through Mailgun by default, click Make default beside the account.
Also select Reply from the same address the message was sent to if you want Gmail to automatically reply through the correct account.
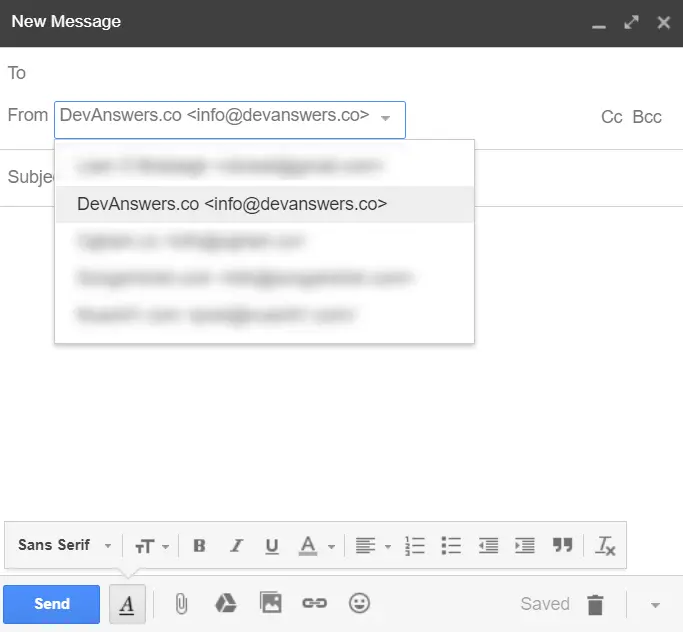
When composing a new message in Gmail, you should see your new account in the From field.
You’re all done! If you have any other domains, you can also add them to your Gmail account by repeating the steps in this guide.
Let me know if this helped. Follow me on Twitter, Facebook and YouTube, or 🍊 buy me a smoothie.
My solution, now that mailgun is gone, is to use forwardemail.net to forward emails, and sendgrid to send emails. Works flawlessly 🙂 Good free alternatives to mailgun.
Thanks. I’ll consider that for the updated article.
Landed on this article and wondered if you’d found another solution. I’m also a mailgun user from before the changes, but I know that I’m going to need to swich eventually since I can’t add anymore new routes. Any updates or thoughts on the solutions provided in these comments?
Hi Dave. I have to put some time aside to test some other solutions and update the article.
Mailgun started charging me a few cent per month (as I don’t really send that many mails). Then they emailed me a few days ago and said they wouldn’t charge me at all because the invoices were so low (probably costs them more in transaction fees!). So I am still using Mailgun for free for now, but as you say, I cannot create any new routes without upgrading to one of their paid plans.
So, for now I am still using Mailgun for free, but I’m not sure if this change in policy applies to new Mailgun users.
I was using Mailgun since learning recently from them that nothing is free anymore starting March 1st I believe. So I did some research and found out about this free and open source solution ForwardEmail (forwardemail.net). It seems pretty neat, you just configure the routes with TXT records (in addition to the MX records pointing to their servers), you can even self-host the software (but I guess it’s not that easy). A few drawbacks:
the e-mails you receive have [email protected] in the From field, but the original sender in the Reply-To field, so no change from the sender’s point of view.
no SMTP for sending e-mails, the solution they suggest is only for Gmail and requires 2-factor authentication.
Thanks for that. I am still researching and will update this article shortly. Another free solution is ImprovMX but I have not tested it yet. There are also lot of very cheap email forwarding solutions I want to test.
“”
Sort your incoming mail and save time with routes.
Routes is a premium feature, only available for users on plans Foundation and higher.
– Mailgun “”
as of Jan 25, 2020 : creating route is a premium feature. I tried it.
Nice tutorial though.
Please provide a update if you have any. Thanks.
Thanks for the update, Kailash.
I just logged into Mailgun and see they have completely redesigned their interface as well.
All my Routes are still there so I guess they are only charging new members.
That’s a big shame.
I will update this article to warn others and try to find another free solution for domains going forward.
Thank you. This was very helpful.
Took three days for the confirmation email to appear but I finally did it. Really good tutorial. Thank you!
Great!
Mailgun now requires upgrading to add custom domains. It is still free until 10k emails sent.
Working great, though. Thank you!
With both Free and Concept plans, you receive 10,000 free messages per month. If you authorize your credit card on file, you’re upgraded to the Concept plan (so it’s essentially the Free plan, with credit card information present). With the Concept plan comes the following benefits:
Followed your instructions exactly and everything worked. Many thanks
Cool 😎
Great Tutorial.
Help needed
I add all DNS records to my domain in order to verify it! I have not yet been able to verify and have already added the DNS to more than 2 days! Its normal?
the only difference was that I need to put ” in TXT DNS, all go fine in my DNS manager!
I periodically click Check DNS Records and and remains unverified.
Any suggestion?
Thank you!!!
It shouldn’t take that long so I suspect your DNS records are not configured correctly.
It’s hard for me to troubleshoot without seeing your DNS records. If you like, you can send a screengrab of your DNS settings to info at devanswe.rs and I’ll have a look.
NOT FREE
Perhaps the article wasn’t clear enough so I have clarified a few things.
Mailgun has an allowance of 10,000 free emails per month (that’s around 330 emails per day), which is more than enough for personal email or a small website. Gmail has a similar limit of “500 recipients per day” – if you send any more than that, your Gmail account will be blocked for 24 hours.
If you intend on sending more than 330 email per day, this guide is perhaps not for you, and you probably won’t find any email service that would allow such volume for free.
I can't get the verification email to deliver to my Gmail 🙁 It comes with the following error mail instead of the verification link when I set up the new "send mail as". "Message not delivered Your message couldn't be delivered because the remote server is misconfigured. See technical details below for more information. The response from the remote server was: 550 5.7.1 Relaying denied" Any idea what I can do to fix this? DNS is fully verified and route is checked to work in mailgun!
Hey mate. Have you solved the problem? I have the same error
Great Tutorial.
Help needed
I think after route, mail should be forwarded to Gmail account.
Then only, we will get the confirmation code for verification.
I can’t get any mail to gmail account.
DNS verification done(all MX, TXT and CNAME)
Route is also perfect.
Any suggestion?
This is just what i was looking for !,thank you so much !
Great article! Do you think it’s possible to set different routes for different email addresses? Eg. [email protected] will route to gmail, while [email protected] will route to the existing mail server at pop.domain.com?
I don’t think you can do that with Routes. You can only match a rule and forward to another email address, not forward to a different mail server. I think in your case you would need your own mail server and do the forwarding there.
Very helpful and works flawlessly, thank you very much!
👍
This is awesome, I can receive mail at my new address – but I can’t seem to send mail as that address. When I try from Gmail, nothing happens when I click “Send” on the email draft, and checking the browser console I get a very cryptic uncaught exception:
HLa {message: “Error in protected function: Class$obf_1011: g8a…”, stack: “Error: Class$obf_1011: g8a… at ISb.fE.Fa (https…8o,sy1ew,sy1ev,e,sy1ho,sy1o0,sy1t2,zPd59e:761:71)”}
Any clues on this?
Disable all Chrome Extensions. Log out of Gmail, restart browser and try again. Also try in a different browser.
works like a charm!
Great, thanks for the feedback!
One of the best tutorials I’ve followed in a while! Thank you!
Glad it helped 🙂
Three toots for this tut!!!
Nailed it.
👍
It’s better to use a subdomain. Mailgun highly recommends it too. Your screenshot also says so.
But then the email address would be [email protected], and that’s not what we want here.
Here’s what Mailgun says in the FAQ:
I dont receive the gmail..?
DNS verified? Route configured correctly?
Thank you so much! It works perfectly!!!
Great!! 🙂
where do you receive gmail verification email?
You should receive it in your Gmail account. If you didn’t, it means your Mailgun Route may not be configured correctly. Also confirm that the DNS records have propagated correctly.
thank you so much, route was the problem
I had to select “Reply from the same address the message was sent to” in Gmail, to be able to send emails from my own domain address, it might be useful for others as well if you add it to your post.
thanks for the great post
Post has been updated. All the best!
Thank you! Super helpful article.
You’re welcome, glad it helped 🙂