Prerequisites
You should already have Apache installed and serving web pages before following this guide.
This guide was tested on Ubuntu 22.04, Ubuntu 20.04 and Ubuntu 18.04, though it should also be useful for other Debian-based systems.
If you need to install Apache on Ubuntu, please see:
- Installing Apache on Ubuntu 20.04 / 20.10 with Virtual Hosts
- Installing Apache on Ubuntu 18.04 / 19.10 with Virtual Hosts
1. Add Repository
The software-properties-common package is required to add Ondřej’s PHP repository, which will allow us to download co-installable versions of PHP.
sudo apt install software-properties-common -ysudo add-apt-repository ppa:ondrej/php -yUpdate repository:
sudo apt update -yNext install libapache2-mod-fcgid. This starts a number of CGI program instances to handle concurrent requests.
sudo apt install libapache2-mod-fcgid2. Install Multiple PHP Versions
You can now install the versions of PHP you require.
As of writing, Ondřej’s repository provides PHP 5.6, 7.0, 7.1, 7.2, 7.3, 7.4, 8.0, 8.1 and 8.2.
In this example, we will install PHP 5.6 and PHP 7.4.
You will also need to install the following packages for each PHP version.
phpX.X-fpm– Fast Process Manager interpreter that runs as a daemon and receives Fast/CGI requests.phpX.X-mysql– This connects PHP to the MySQL database.libapache2-mod-phpX.X– This provides the PHP module for the Apache webserver.
Install PHP 5.6 and associated packages. Press y and ENTER when prompted to install.
sudo apt install php5.6 php5.6-fpm php5.6-mysql libapache2-mod-php5.6Install PHP 7.4 and associated packages. Press y and ENTER when prompted to install.
sudo apt install php7.4 php7.4-fpm php7.4-mysql libapache2-mod-php7.4Once installed, you should have two new sockets in /var/run/php/.
ls -la /var/run/php/total 8
-rw-r--r-- 1 root root 4 Feb 17 16:50 php5.6-fpm.pid
srw-rw---- 1 www-data www-data 0 Feb 17 16:50 <span class="red">php5.6-fpm.sock</span>
-rw-r--r-- 1 root root 5 Feb 17 16:51 php7.4-fpm.pid
srw-rw---- 1 www-data www-data 0 Feb 17 16:51 <span class="red">php7.4-fpm.sock</span>In Step 3, we will use the <FilesMatch> directive to tell Apache which PHP socket to use.
Other Extensions/Libraries
Note that if you need any other libraries or extensions, they must be installed separately per PHP version.
The command below includes some of the most popular PHP extensions, which should cover a typical WordPress site.
For PHP 5.6:
sudo apt install php5.6-common php5.6-mysql php5.6-xml php5.6-xmlrpc php5.6-curl php5.6-gd php5.6-imagick php5.6-cli php5.6-dev php5.6-imap php5.6-mbstring php5.6-opcache php5.6-soap php5.6-zip php5.6-intl -yFor PHP 7.4:
sudo apt install php7.4-common php7.4-mysql php7.4-xml php7.4-xmlrpc php7.4-curl php7.4-gd php7.4-imagick php7.4-cli php7.4-dev php7.4-imap php7.4-mbstring php7.4-opcache php7.4-soap php7.4-zip php7.4-intl -y3. Start PHP-FPM Services
You must now start the FPM services per version of PHP you installed.
In this example, we will start PHP 5.6 first.
sudo systemctl start php5.6-fpmOnce started, check the status:
sudo systemctl status php5.6-fpmOutput:
<span class="green">●</span> php5.6-fpm.service - The PHP 5.6 FastCGI Process Manager
     Loaded: loaded (/lib/systemd/system/php5.6-fpm.service; enabled; vendor preset: enabled)
     Active: <span class="green">active (running)</span> since Fri 2023-09-29 20:21:16 IST; 14min ago
       Docs: man:php-fpm5.6(8)
   Main PID: 94753 (php-fpm5.6)
     Status: "Processes active: 0, idle: 2, Requests: 0, slow: 0, Traffic: 0req/sec"
      Tasks: 3 (limit: 1131)
     Memory: 28.2M
     CGroup: /system.slice/php5.6-fpm.service
             ├─94753 php-fpm: master process (/etc/php/5.6/fpm/php-fpm.conf)
             ├─94764 php-fpm: pool www
             └─94765 php-fpm: pool www

Sep 29 20:21:22 devanswers systemd[1]: php5.6-fpm.service: Succeeded.
Sep 29 20:21:22 devanswers systemd[1]: Stopped The PHP 5.6 FastCGI Process Manager.
Sep 29 20:21:22 devanswers systemd[1]: Starting The PHP 5.6 FastCGI Process Manager...
Sep 29 20:21:22 devanswers systemd[1]: Started The PHP 5.6 FastCGI Process Manager.
Now repeat the commands for the next PHP version, in this example, PHP 7.4.
sudo systemctl start php7.4-fpmOnce started, check the status:
sudo systemctl status php7.4-fpmOutput:
<span class="green">●</span> php7.4-fpm.service - The PHP 7.4 FastCGI Process Manager
     Loaded: loaded (/lib/systemd/system/php7.4-fpm.service; enabled; vendor preset: enabled)
     Active: <span class="green">active (running)</span> since Fri 2023-09-29 14:49:16 IST; 10min ago
       Docs: man:php-fpm7.4(8)
   Main PID: 94753 (php-fpm7.4)
     Status: "Processes active: 0, idle: 2, Requests: 0, slow: 0, Traffic: 0req/sec"
      Tasks: 3 (limit: 1131)
     Memory: 28.2M
     CGroup: /system.slice/php7.4-fpm.service
             ├─94753 php-fpm: master process (/etc/php/7.4/fpm/php-fpm.conf)
             ├─94764 php-fpm: pool www
             └─94765 php-fpm: pool www

Sep 29 14:49:48 devanswers systemd[1]: php7.4-fpm.service: Succeeded.
Sep 29 14:49:48 devanswers systemd[1]: Stopped The PHP 7.4 FastCGI Process Manager.
Sep 29 14:49:48 devanswers systemd[1]: Starting The PHP 7.4 FastCGI Process Manager...
Sep 29 14:49:48 devanswers systemd[1]: Started The PHP 7.4 FastCGI Process Manager.
4. Configure Apache
We need to add some Apache modules using a2enmod.
actions– used for executing CGI scripts based on media type or request method.fcgid– a high performance alternative to mod_cgi that starts a sufficient number of instances of the CGI program to handle concurrent requests.alias– provides for the mapping of different parts of the host filesystem in the document tree, and for URL redirection.proxy_fcgi– allows Apache to forward requests to PHP-FPM.
sudo a2enmod actions fcgid alias proxy_fcgiRestart Apache.
sudo systemctl restart apache2You can now use either Virtual Hosts or .htaccess to instruct Apache which version of PHP to use.
5. Virtual Hosts Method
Open your Apache .conf file and add the <FilesMatch> directive to your Virtual Host.
To view your Virtual Hosts, run:
sudo ls -la /etc/apache2/sites-available/If you are running multiple domains on your Apache server, you should see multiple .conf files here. If not, you may only have 000-default.conf. In that case, you can edit this file:
sudo nano /etc/apache2/sites-available/000-default.confWithin the <VirtualHost *:80> container (or <VirtualHost *:433> if you are running SSL), add a FilesMatch directive to instruct the virtual host to run a specific version of PHP.
PHP 5.6 Example
<VirtualHost *:80>
    <FilesMatch \.php> # Apache 2.4.10+ can proxy to unix socket
        SetHandler "proxy:unix:/var/run/php/<span class="red">php5.6-fpm.sock</span>|fcgi://localhost/"
    </FilesMatch>
</VirtualHost>
Save and exit (press CTRL + X, press Y, then press ENTER)
Make sure to restart Apache after making changes to the Virtual Hosts.
sudo systemctl restart apache2PHP 7.4 Example
<VirtualHost *:80>
    <FilesMatch \.php> # Apache 2.4.10+ can proxy to unix socket
        SetHandler "proxy:unix:/var/run/php/<span class="red">php7.4-fpm.sock</span>|fcgi://localhost/"
    </FilesMatch>
</VirtualHost>
Save and exit (press CTRL + X, press Y, then press ENTER)
Make sure to restart Apache after making changes to the Virtual Hosts.
sudo systemctl restart apache26. htaccess Method
Instead of the virtual hosts method, you can add the <FilesMatch> directive to your .htaccess file. Before you do, make sure that AllowOverride is enabled, otherwise Apache will ignore .htaccess.
Open the Apache config file.
sudo nano /etc/apache2/apache2.confScroll down the the following section and make sure that AllowOverride is set to All.
<Directory /var/www/>
        Options Indexes FollowSymLinks
        AllowOverride <span class="red">All</span>
        Require all granted
</Directory>
Save and exit (press CTRL + X, press Y and then press ENTER)
Restart Apache.
sudo systemctl restart apache2Now you can add the <FilesMatch> directive to your .htaccess file.
PHP 5.6 Example
<FilesMatch \.php>
    # Apache 2.4.10+ can proxy to unix socket
    SetHandler "proxy:unix:/var/run/php/<span class="red">php5.6-fpm.sock</span>|fcgi://localhost/"
</FilesMatch>
PHP 7.4 Example
<FilesMatch \.php>
    # Apache 2.4.10+ can proxy to unix socket
    SetHandler "proxy:unix:/var/run/php/<span class="red">php7.4-fpm.sock</span>|fcgi://localhost/"
</FilesMatch>
7. Test PHP
To see which version of PHP Apache is serving, create a new file called info.php in your web document root.
In this example, we will create a new file in /var/www/html/, though this should be in your own virtual host document root.
sudo nano /var/www/html/info.phpEnter the following PHP code.
phpinfo();
?>
Save file and exit. (Press CTRL + X, press Y and then press ENTER)
We can now load this file in the browser by going to http://example.com/info.php or http://your_ip/info.php
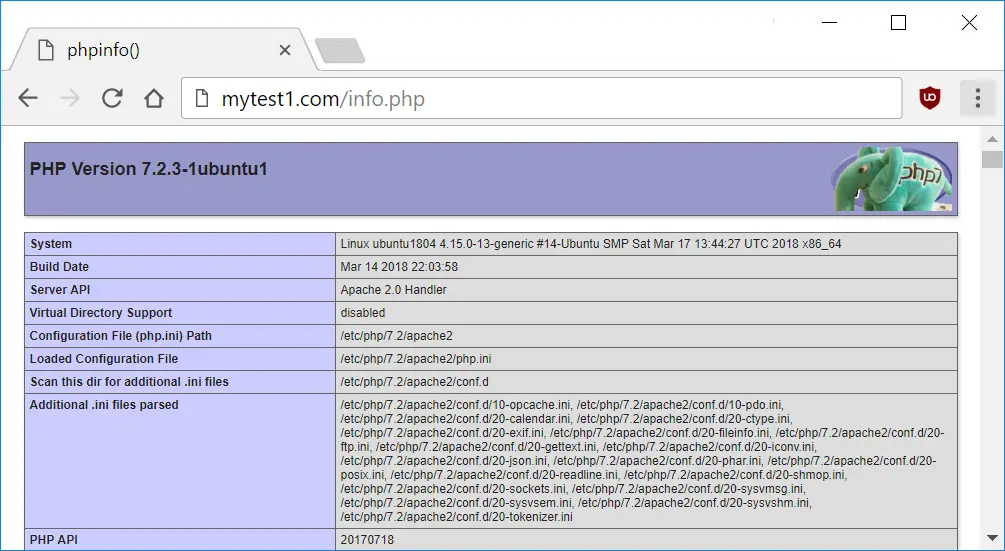
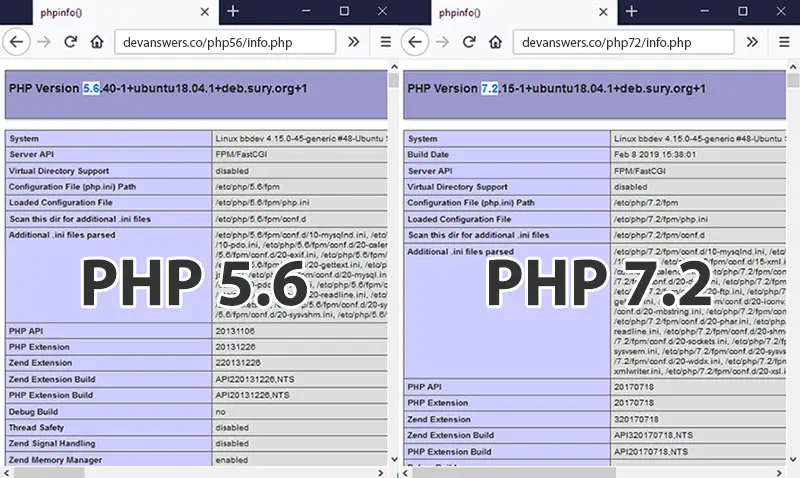
Below we can see the PHP info page with the PHP version clearly displayed.

Don’t forget to delete info.php as it contains information that could be useful to hackers.
sudo rm /var/www/html/info.phpLet me know if this helped. Follow me on Twitter, Facebook and YouTube, or 🍊 buy me a smoothie.

Thank you.
This solved a very bothersome problem that frustrated me for months. I’ve used Mailzu to control the quarantine on my Postfix/Dovecot servers for the last 18 years and PHP8 left it in the dust.
With your help, it’s now working again. Awesome work my friend!
Ayyy man! Thank you very much. This article explains the prcocess beautifully. Keep doing the good work!
dear sir, can you explain more detail step 4 and 5?
and how to setup phpmyadmin with multi php?
make a file .htaccess in a folder in /var/www/html folder (example 7.4)
put that .htaccess in folder 7.4
open .htaccess
fill this :
# Apache 2.4.10+ can proxy to unix socket
SetHandler “proxy:unix:/var/run/php/php7.4-fpm.sock|fcgi://localhost/”
and save.
““
for phpmyadmin
download manually.
extract and put in folder 7.4
I had missed a step – instructing PHP which version to use. Since I am running my site with SSL, I edited /etc/apache2/sites-available/mysite.com-le-ssl.conf:
…
ServerName mysite.com
ServerAlias http://www.mysite.com mysite.com
ServerAdmin [email protected]
DocumentRoot /var/www/mysite.com/public_html
# Apache 2.4.10+ can proxy to unix socket
SetHandler “proxy:unix:/var/run/php/php7.4-fpm.sock|fcgi://localhost/”
…
But in reality – with or without this edit, phpinfo.php reports the same thing – that the Server API is FPM/FastCGI. I include the first part of the output below – it looks nothing like yours, which doesn’t appear to make reference to php-fpm. Elsewhere, folks are telling me php-fpm is deciding ownership and permissions for uploaded files, not Apache, which would explain why my changes to envvars don’t seem to have any effect. Any ideas about what accounts for the difference, apart from the fact that I am using SSL?
PHP Version 7.4.20
System Linux myvps.myprovider.com 5.4.0 #1 SMP Thu Apr 22 16:18:59 MSK 2021 x86_64
Build Date Jun 4 2021 21:24:55
Server API FPM/FastCGI
Virtual Directory Support disabled
Configuration File (php.ini) Path /etc/php/7.4/fpm
Loaded Configuration File /etc/php/7.4/fpm/php.ini
Scan this dir for additional .ini files /etc/php/7.4/fpm/conf.d
Additional .ini files parsed /etc/php/7.4/fpm/conf.d/10-mysqlnd.ini, /etc/php/7.4/fpm/conf.d/10-opcache.ini, /etc/php/7.4/fpm/conf.d/10-pdo.ini, /etc/php/7.4/fpm/conf.d/15-xml.ini, /etc/php/7.4/fpm/conf.d/20-calendar.ini, /etc/php/7.4/fpm/conf.d/20-ctype.ini, /etc/php/7.4/fpm/conf.d/20-dom.ini, /etc/php/7.4/fpm/conf.d/20-exif.ini, /etc/php/7.4/fpm/conf.d/20-ffi.ini, /etc/php/7.4/fpm/conf.d/20-fileinfo.ini, /etc/php/7.4/fpm/conf.d/20-ftp.ini, /etc/php/7.4/fpm/conf.d/20-gettext.ini, /etc/php/7.4/fpm/conf.d/20-iconv.ini, /etc/php/7.4/fpm/conf.d/20-json.ini, /etc/php/7.4/fpm/conf.d/20-mbstring.ini, /etc/php/7.4/fpm/conf.d/20-mysqli.ini, /etc/php/7.4/fpm/conf.d/20-pdo_mysql.ini, /etc/php/7.4/fpm/conf.d/20-phar.ini, /etc/php/7.4/fpm/conf.d/20-posix.ini, /etc/php/7.4/fpm/conf.d/20-readline.ini, /etc/php/7.4/fpm/conf.d/20-shmop.ini, /etc/php/7.4/fpm/conf.d/20-simplexml.ini, /etc/php/7.4/fpm/conf.d/20-sockets.ini, /etc/php/7.4/fpm/conf.d/20-sysvmsg.ini, /etc/php/7.4/fpm/conf.d/20-sysvsem.ini, /etc/php/7.4/fpm/conf.d/20-sysvshm.ini, /etc/php/7.4/fpm/conf.d/20-tokenizer.ini, /etc/php/7.4/fpm/conf.d/20-xmlreader.ini, /etc/php/7.4/fpm/conf.d/20-xmlwriter.ini, /etc/php/7.4/fpm/conf.d/20-xsl.ini
PHP API 20190902
PHP Extension 20190902
Zend Extension 320190902
Zend Extension Build API320190902,NTS
PHP Extension Build API20190902,NTS
Ei man thank you =)
how to setup multiple php versions for nginx?
Unfortunately, I don’t have an article for Nginx yet, but steps 1 and 2 are the same, instead you edit your Nginx conf and add/edit
fastcgi_pass unix:/run/php/phpX.X-fpm.sockchangingphpX.Xto the version of PHP you want to run for that particular virtual host.Excellent solution, but I agree with the friends below, steps missing:
a2enconf php5.6-fpm
a2enconf php7.2-fpm
service php7.2-fpm start
service php5.6-fpm start
service apache2 reload
Thanks, I’ve updated the guide.
Can others let me know if this works ok?
php myadmin is not working with php 5.6 but working with 7.2 how to fix it?