In this guide we will install and configure phpMyAdmin to work with Apache on Ubuntu 16.04 / 17.10.
Prerequisites
You should be using a non-root user with sudo privileges as explained in Ubuntu 16.04 / 17.10 Initial Server Setup.
You should also have your LAMP stack (Apache, MySQL and PHP) already installed before continuing with this guide. If you don’t have these installed yet, please see Installing a LAMP Stack (Apache, MySQL, PHP) on Ubuntu 16.04 / 17.10
1. Install phpMyAdmin
Let’s begin by updating the list of available packages and installing phpMyAdmin, and two PHP extensions (php-mbstring and php-gettext) .
sudo apt-get updatesudo apt-get install phpmyadmin php-mbstring php-gettext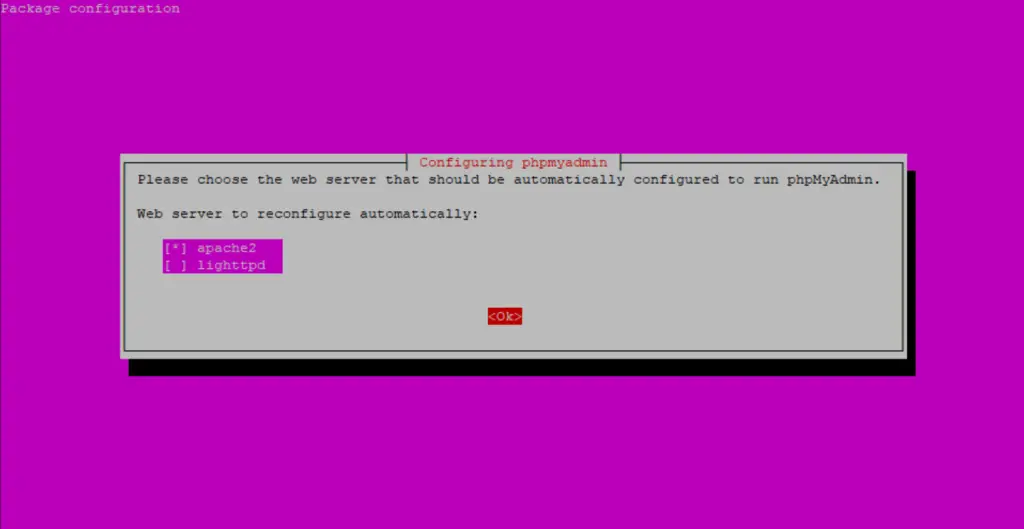
In the phpMyAdmin Package configuration page, Press SPACE to put a star [*] beside apache2, then press TAB to highlight OK and press ENTER.

Select Yes and press ENTER to install and configure the database.
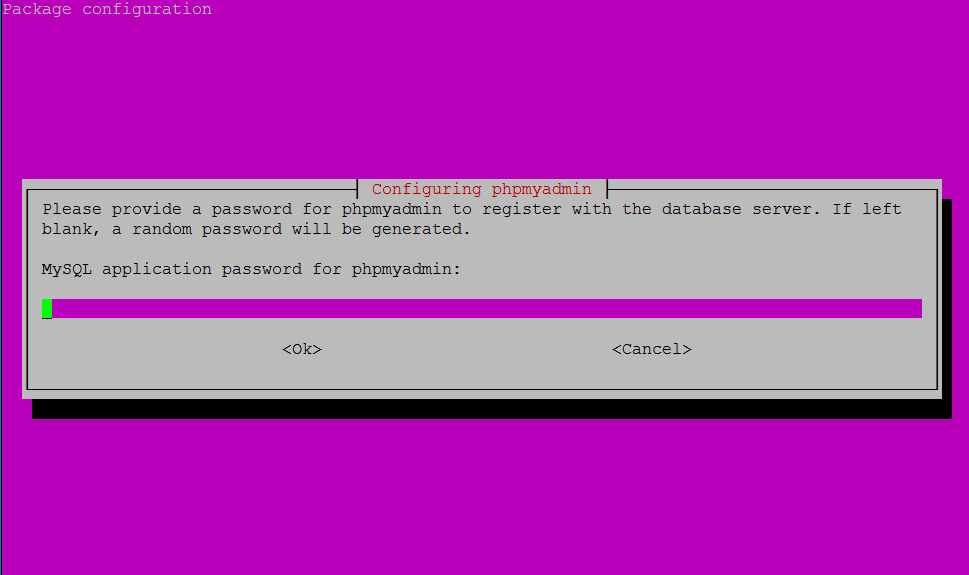
The MySQL application password is only used internally by phpMyAdmin to communicate with MySQL. You can leave this blank and a password will be generated automatically.
Enable the PHP mcrypt and mbstring extensions.
sudo phpenmod mcryptsudo phpenmod mbstringNow restart Apache
sudo systemctl restart apache23. Test phpMyAdmin
You should now be able to access the phpMyAdmin web interface by visiting your server’s domain name or public IP address followed by /phpmyadmin. e.g. http://example.com/phpmyadmin or http://192.168.1.10/phpmyadmin
If you don’t have a domain name yet or don’t know your IP, you can find out with:
ip addr show eth0 | grep inet | awk '{ print $2; }' | sed 's/\/.*$//'
You can now log in with the user root. You will have set up this root user and password when installing MySQL for the first time.
You’re done!
Let me know if this helped. Follow me on Twitter, Facebook and YouTube, or 🍊 buy me a smoothie.