1. Install PHP
Unlike Apache, Nginx does not contain native PHP processing. For that we have to install PHP-FPM (FastCGI Process Manager). FPM is an alternative PHP FastCGI implementation with some additional features useful for heavy-loaded sites.
You should add Ubuntu’s universe repository before installing php-fpm to ensure you get the correct package.
sudo add-apt-repository universeNow update the package lists and install PHP-FPM on Ubuntu 20.04. We will also install php-mysql to allow PHP to communicate with the MySQL database. Press y and ENTER when asked to continue.
sudo apt update && sudo apt install php-fpmIf you intend on using MySQL, you should also install the php-mysql package.
sudo apt install php-mysqlOnce installed, check the PHP version.
php --versionIf PHP was installed correctly, you should see something similar to below.
PHP 7.4.3 (cli) (built: Mar 26 2020 20:24:23) ( NTS )
Copyright (c) The PHP Group
Zend Engine v3.4.0, Copyright (c) Zend Technologies
    with Zend OPcache v7.4.3, Copyright (c), by Zend Technologies
Above we are using PHP version 7.4, though this may be a later version for you depending on which package was in the repository.
Depending on what version of Nginx and PHP you install, you may need to manually configure the location of the PHP socket that Nginx will connect to.
List the contents for the directory /var/run/php/
ls /var/run/php/You should see a few entries here.
total 4
lrwxrwxrwx 1 root     root     30 Apr 27 23:28 php-fpm.sock -> /etc/alternatives/php-fpm.sock
-rw-r--r-- 1 root     root      5 Apr 27 23:28 php7.4-fpm.pid
srw-rw---- 1 www-data www-data  0 Apr 27 23:28 php7.4-fpm.sock
Above we can see the socket is called php7.4-fpm.sock. Remember this as you may need it for the next step.
2. Configure Nginx for PHP
We now need to make some changes to our Nginx server block.
The location of the server block may vary depending on your setup. By default, it is located in /etc/nginx/sites-available/default. If you followed one of our previous guides on setting up Nginx with multiple domains, your config file may be located somewhere like /etc/nginx/sites-available/example.com.
Edit the file in nano.
sudo nano /etc/nginx/sites-available/default2.1. Prioritize index.php
Press CTRL + W and search for index.html.
Now add index.php before index.html
index index.php index.html index.htm index.nginx-debian.html;2.2. Server Name
Press CTRL + W and search for the line server_name.
Enter your server’s IP here or domain name if you have one.
server_name YOUR_DOMAIN_OR_IP_HERE;2.3. PHP Socket
Press CTRL + W and search for the line location ~ \.php.
You will need to uncomment some lines here by removing the # signs before the four lines marked in red below.
Also ensure value for fastcgi_pass socket path is correct. For example, if you installed PHP version 7.4, the socket should be: /var/run/php/php7.4-fpm.sock
If you are unsure which socket to use here, exit out of nano and run ls /var/run/php/
        location ~ \.php$ {
                include snippets/fastcgi-php.conf;
        #
        #       # With php-fpm (or other unix sockets):
                fastcgi_pass unix:/var/run/php/php7.4-fpm.sock;
        #       # With php-cgi (or other tcp sockets):
        #       fastcgi_pass 127.0.0.1:9000;
        }
Make sure to remove the # sign before the closing bracket } in red above.
2.4. Save and Test
Once you’ve made the necessary changes, save and close (Press CTRL + X, then press y and ENTER to confirm save)
Now check the config file to make sure there are no syntax errors.
sudo nginx -tOutput:
nginx: the configuration file /etc/nginx/nginx.conf syntax is ok
nginx: configuration file /etc/nginx/nginx.conf test is successful
If no errors, you can reload the Nginx config.
sudo service nginx reload3. Test PHP
To see if PHP is working correctly on Ubuntu 20.04, create a new PHP file called info.php in the document root directory. By default, this is located in /var/www/html/, or if you set up multiple domains in a previous guide, it may be located in somewhere like /var/www/mytest1.com/public_html
Once you have the correct document root directory, use the nano text editor to create a new file info.php
sudo nano /var/www/html/info.phpType or paste the following code into the new file.
<?php
phpinfo();
Save and exit (press CTRL + X, press Y and then press ENTER)
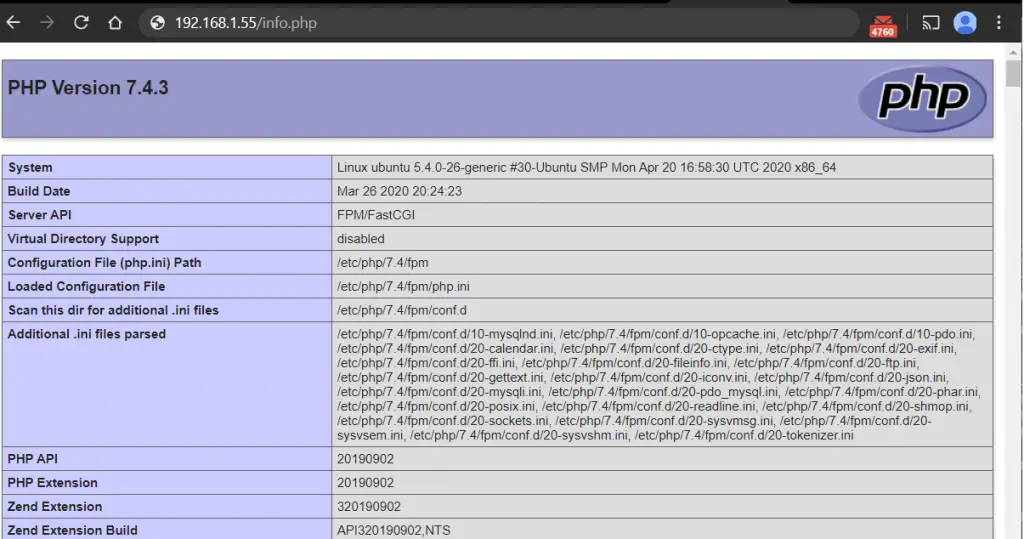
You can now view this page in your web browser by visiting your server’s domain name or public IP address followed by /info.php: http://your_domain_or_IP/info.php
ip addr show eth0 | grep inet | awk '{ print $2; }' | sed 's/\/.*$//'
phpinfo() outputs a large amount of information about the current state of PHP. This includes information about PHP compilation options and extensions, the PHP version and server information.
You have now successfully installed PHP-FPM for Nginx on Ubuntu 20.04.
Make sure to delete info.php as it contains information about the web server that could be useful to attackers.
sudo rm /var/www/html/info.phpLet me know if this helped. Follow me on Twitter, Facebook and YouTube, or 🍊 buy me a smoothie.
The best Nginx configuration I’ve ever encountered!
Hi,
I am running Ubuntu 20.04 on WSL2, don’t know if on an actual linux distro is different. But there isn’t a directory /var/run/php until you run: